Email How-To Tip |
By Jani Kumpula
Senior Webmaster/UI Designer, L-Soft
In Part 1 of this tip, you learned how to get started with LISTSERV Maestro by setting up a subscriber list with custom profile fields, customizing your sign-up page and sending your first email campaign. Now, let's continue where we left off by examining the reporting and analytics capabilities of LISTSERV Maestro and how to take advantage of your tracking data to extend your first mail job into a smart, multi-step campaign.
")
LISTSERV Maestro provides a wealth of data about your email campaigns and subscriber activities. After your mail job has been delivered, it will immediately appear on the dashboard under "Recent Deliveries", allowing you to quickly see your top-line metrics, including open, click and unsubscribe rates in real time.
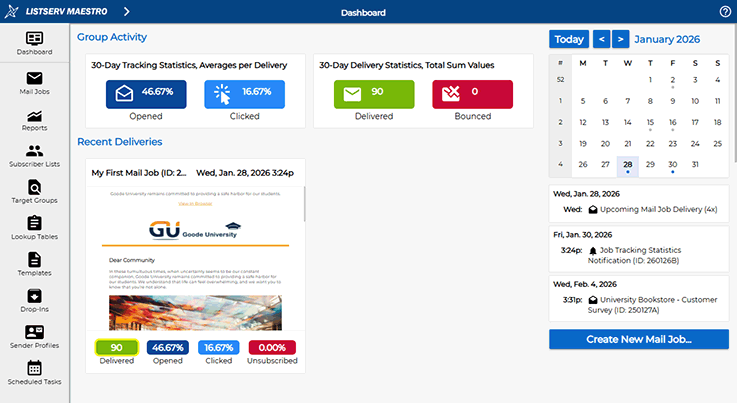
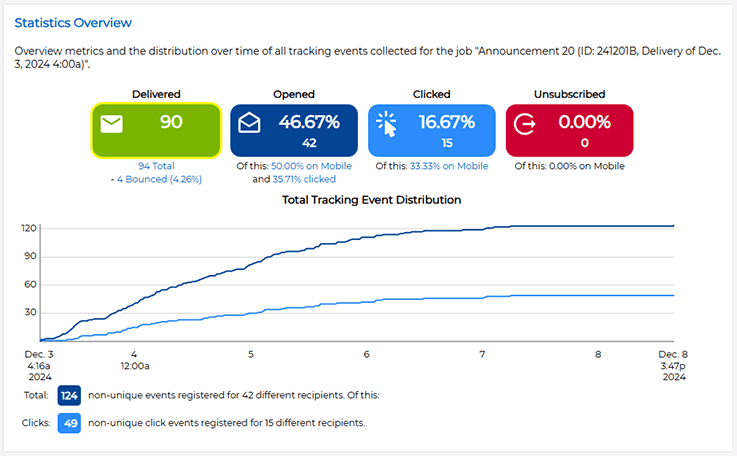
To access more detailed data about your mail job, you can simply click on the newsletter thumbnail, which will open a full-screen report consisting of several sections. The "Statistics Overview" section contains the same overview report as on the dashboard, showing how many subscribers interacted with your message. It also features a time distribution chart, which illustrates when the opens and clicks occurred.
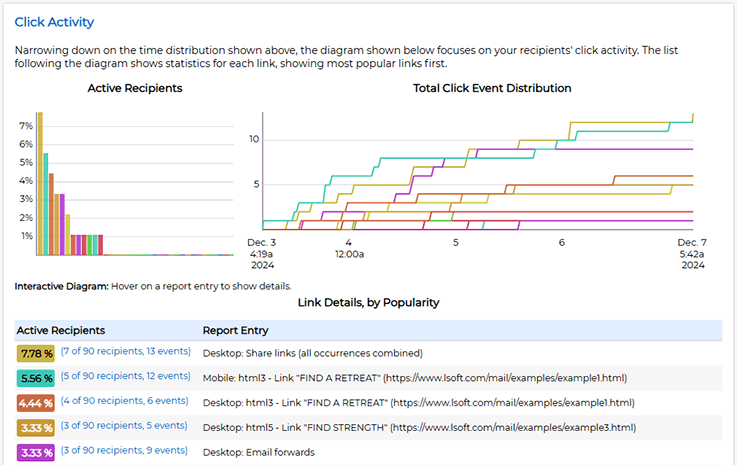
The "Click Activity" section shows exactly how many subscribers clicked on each link and how many times. You'll also see a time distribution chart for when those clicks occurred. The click data also shows how many of the clicks occurred on mobile devices vs desktop email clients, allowing you to learn more about your target audience and how they interact with your content.
The "Click-Rate Visualization" section displays your message with small pie charts overlaid next to all of the links, showing the percentage of your subscribers who clicked on each link. These click rates are relative to the number of subscribers who opened the message and help you identify the areas that received the highest attention among those who viewed the message.

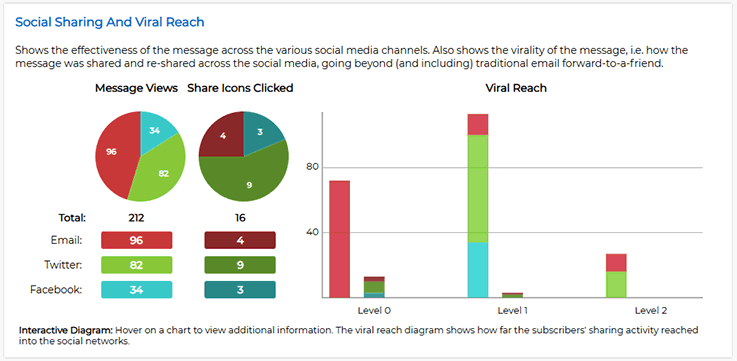
Finally, if you're including social media sharing icons in your messages, the "Social Sharing and Viral Reach" section shows the number of times that your subscribers shared your message with their contacts through social media and any views and new subscribers that you attracted as a result of those shares. All of these reports are downloadable in PDF format, making it easy for you to share the data with your colleagues.
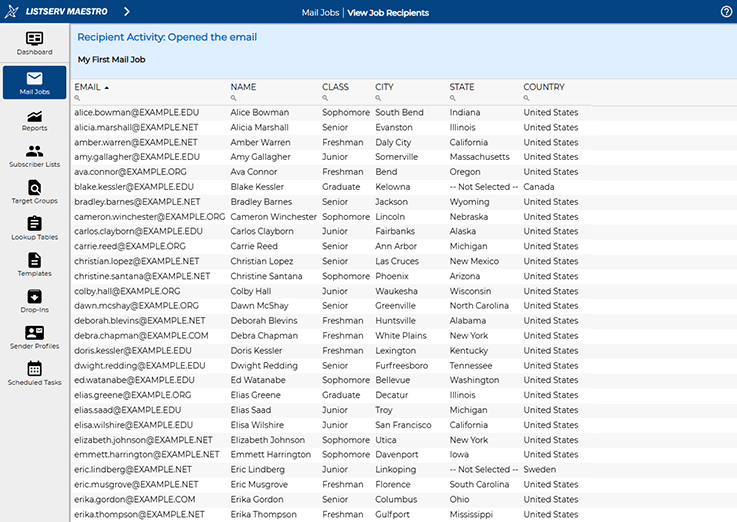
If you're using personal tracking, you'll notice that all of the numbered entries in the reports are clickable. This will show exactly which subscribers opened your message and clicked on which link. It's this data that we'll use in the next section to send smart follow-up messages based on subscriber engagement.
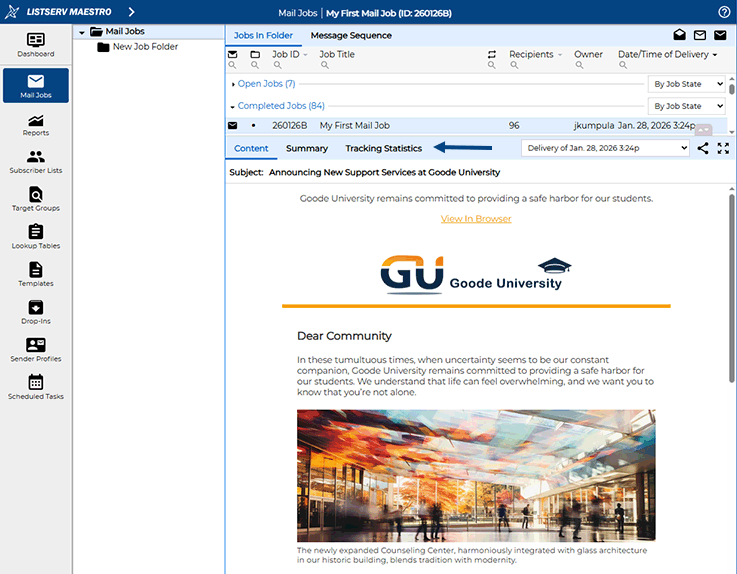
Note that you can also access the tracking data by going to "Mail Jobs" using the main navigation menu and clicking on the name of the job under "Completed Jobs". The "Summary" tab shows all of the details about the mail job, including the list to which it was sent, the tracking type that was used and the message itself, while the "Tracking Statistics" tab shows the same report that you accessed directly from the dashboard.
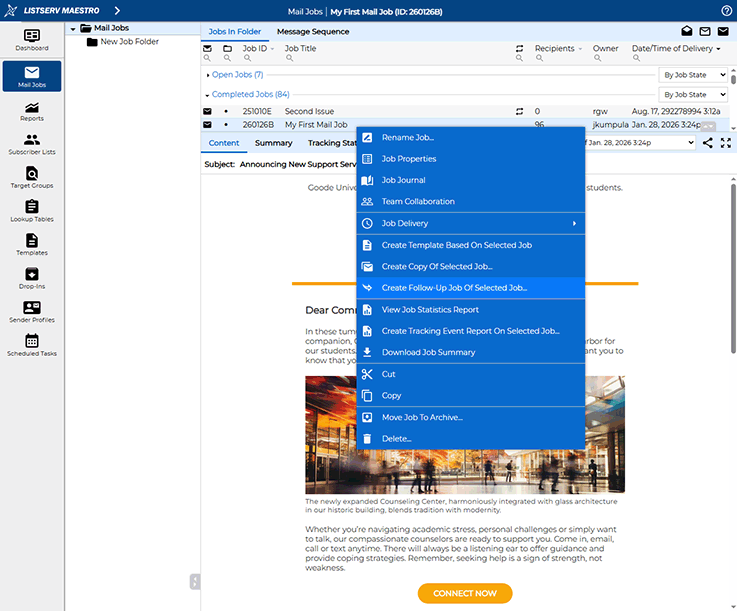
Now that you know how to access all of the engagement metrics for your email campaign, let's take a look at how you can create follow-up jobs based on subscriber behavior. Use the main menu to navigate to "Mail Jobs". Then right-click on your job and select the "Create Follow-Up Job" option from the menu.
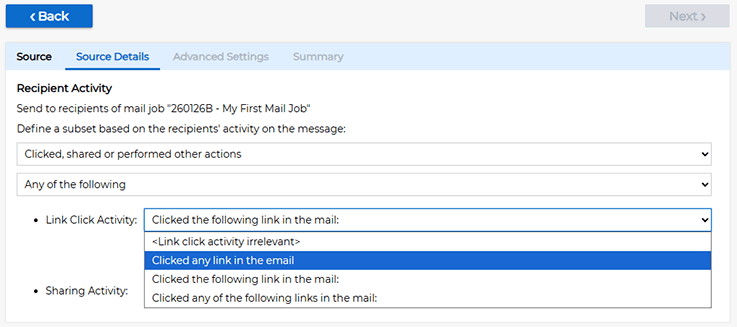
Depending on your campaign goals, follow-up messages can either be sent to those subscribers who ignored the initial message and didn't open it, or you can send it to only those subscribers who opened the email or clicked on a link in the message. Select one of the two options from the pop-up menu.
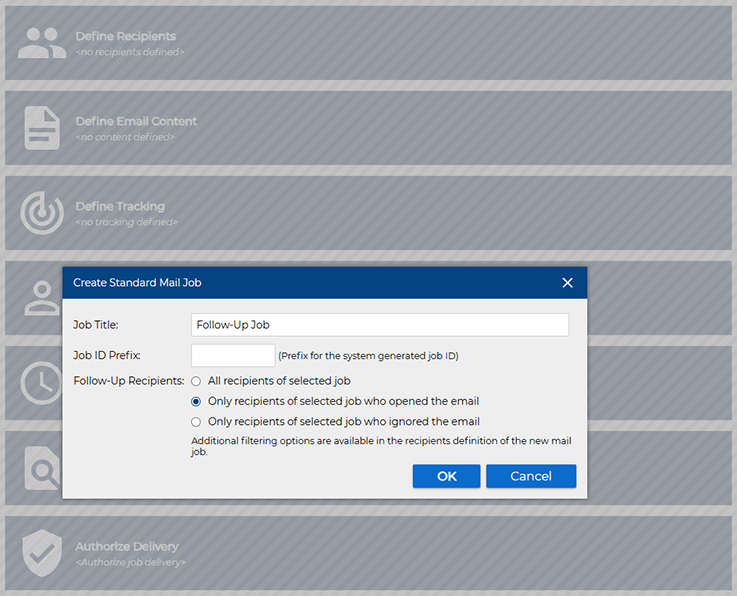
If you want to send your follow-up job to subscribers who opened your email and showed interest in your content, you'll have additional options to further target your follow-up message. You can focus on subscribers who opened your message but didn't click on any links, those who clicked on any link in the message or those who clicked on a specific link or number of links.
After you have made your selection, simply follow the steps in the job workflow as usual to deliver your targeted follow-up message. You can easily send different types of follow-up messages to different subsets of your subscribers based on their interaction with your content. You can also repeat these types of follow-up jobs as many times as you want until you have reached the goals for your campaign.
LISTSERV Maestro offers powerful automation capabilities that allow you to set up email campaigns that are automatically delivered when certain criteria are met. Let's say that one of the required profile fields in your subscriber list is a person's date of birth. In this example, let's set up a repeating email job that is automatically sent out every morning, but only to those subscribers whose birthday it is that day.
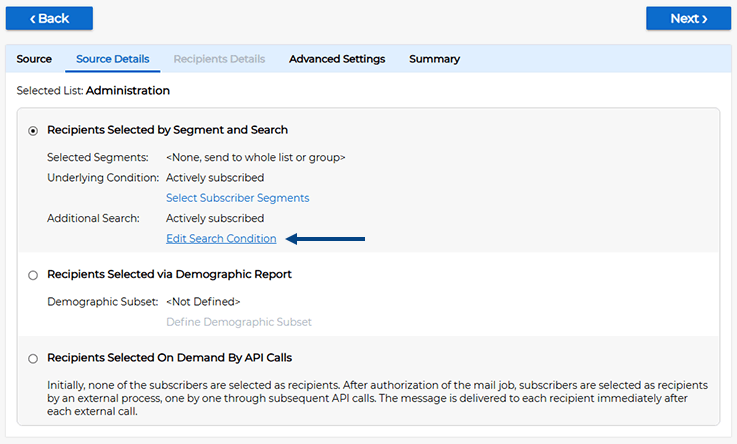
To set up this type of an automated email campaign, create a new mail job as usual. On the "Define Recipients" step in the workflow, select the list to which you would like to send your campaign. Now, instead of sending the job to all of the subscribers, select the "Advanced Subscriber Selection" option. Then click on "Edit Search Condition".
You'll now see all of the subscribers on your list and their profile fields. Now click on the magnifying glass icon under the BIRTHDAY column and add a condition. Select the "Marks a Birthday on a Given Day" and "Relative to the Date of Delivery" options. Here, you can enter, for example, 1, if you'd like the message to be delivered the day before a subscriber's birthday, or 0, if you'd like the message to be delivered on the actual birthday.
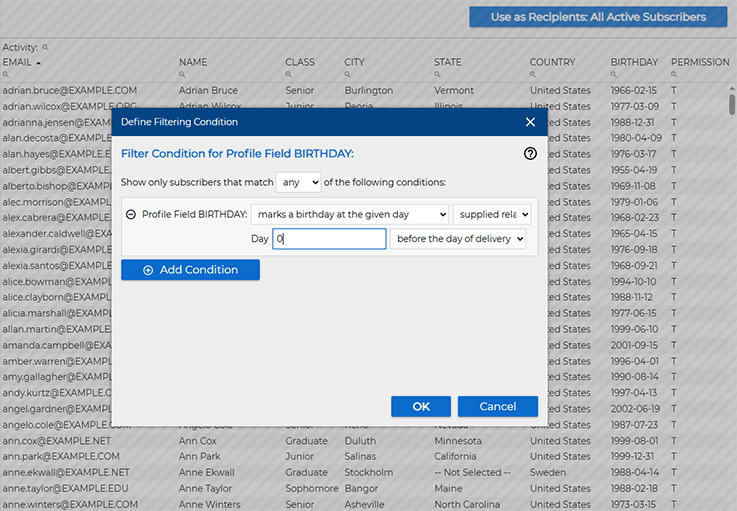
After you click the "OK" button, you will see a preview of the subscribers who would receive the message if it were delivered today. Click the "Use as Recipients" button to finalize the selection.

You can now proceed through the content, tracking and sender definition steps as with any other mail job. On the delivery scheduling step, enter the date and time when you'd like the first message to be sent out, and use the pulldown menu to configure the mail job to auto-repeat every day at the same time until manually stopped.
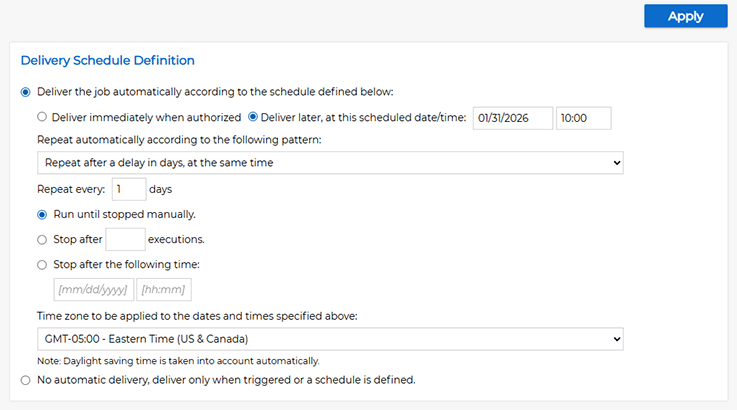
When you authorize the delivery of the job, the system will send the first message on the date and time of your choosing to only those subscribers who have a birthday that day. The system will then repeat this process every day at the same time. If no subscribers have a birthday on a given day, then nothing is sent out, and LISTSERV Maestro will check again the following day. This type of auto-repeat job can technically be left running for years and whenever new subscribers join your list, they will automatically receive the birthday greeting on the date of their next birthday.
In the third and final installment of this series, we'll dig deeper and examine how to create more advanced reports and understand trends over time. You'll also learn how to create multidimensional reports that show the average engagement rates per month, day, or even day of the week or hour of the day, allowing you to pinpoint optimal delivery times to engage your subscribers.
Advanced Reports |
Trends Over Time |
Multidimensional Analytics |
Was this article helpful to you? Would you recommend it to a colleague? Your input helps us create content that truly supports your work. Thank you!
|
Want More Insights? Catch up with the latest LISTSERV developments, industry best practices, expert tips, tutorials and more. |
LISTSERV is a registered trademark licensed to L-Soft international, Inc.
See Guidelines for Proper Usage of the LISTSERV Trademark for more details.
All other trademarks, both marked and unmarked, are the property of their respective owners.