Email How-To Tip |
By Robert Graf-Waczenski
Senior Applications Programmer, L-Soft
If you've just added LISTSERV Maestro to your email toolkit, you're about to unlock a whole new level of communication. This Quick Start Guide walks you through the essentials – from understanding what Maestro adds to your LISTSERV experience to setting up subscriber lists, customizing sign-up pages and launching your first email campaign. Whether you're sending newsletters, outreach campaigns or automated sequences, LISTSERV Maestro gives you the tools to do it smarter, faster and with greater impact. Let's get started.
")
As a LISTSERV user, you're already familiar with its powerful tools for managing discussion groups, announcement lists and searchable archives. LISTSERV Maestro builds on that foundation – transforming your email communications into data-driven, personalized campaigns with measurable impacts.
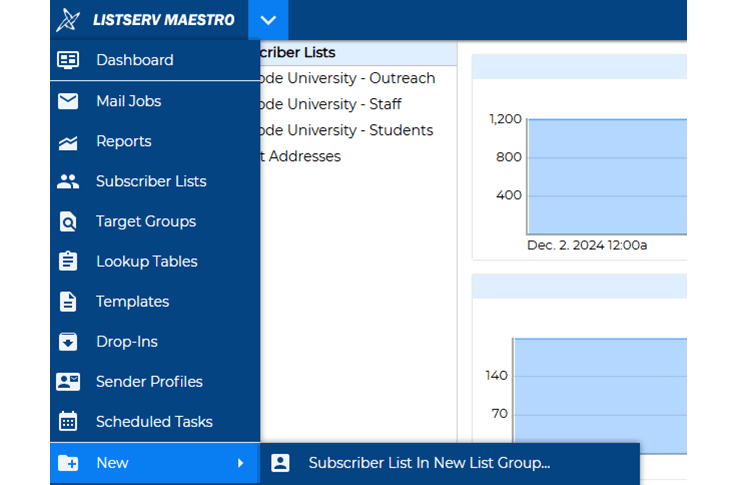
In LISTSERV Maestro, subscriber lists are created independently of traditional LISTSERV lists, giving you more flexibility in how you manage and target your audience. You can also create hybrid subscriber lists that connect directly to existing LISTSERV lists, which is ideal if you want to leverage the advanced tracking and analytics of LISTSERV Maestro while continuing to use your current list infrastructure.
To create a new subscriber list, simply go to the main menu and select "New > Subscriber List". From there, you can define custom profile fields, import subscribers and configure preferences to match your communication goals.
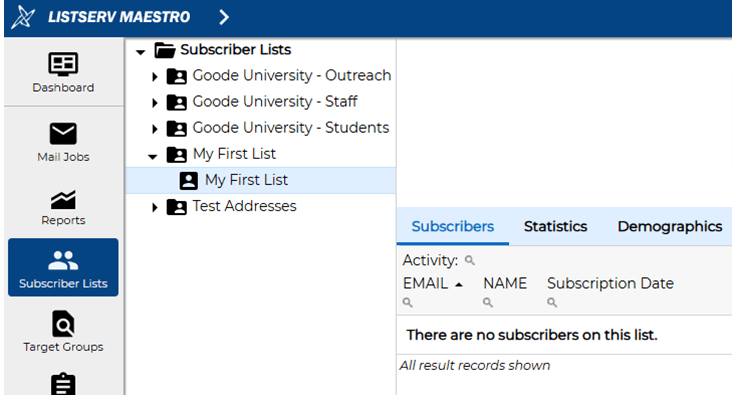
After you have gone through the steps, your first list is created, and you will see a screen like this one:
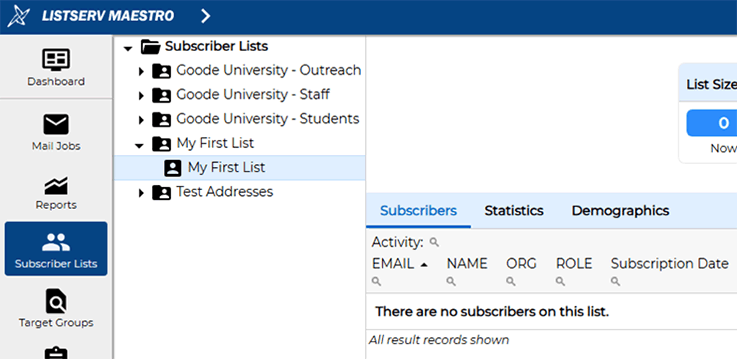
Once your subscriber list is created, you can enhance it by adding custom profile fields to collect meaningful data – such as job title, department, location or interests. These fields help you segment your audience and tailor your messaging for greater relevance and impact.
For example, after adding a few fields, your list might include subscriber details like this:
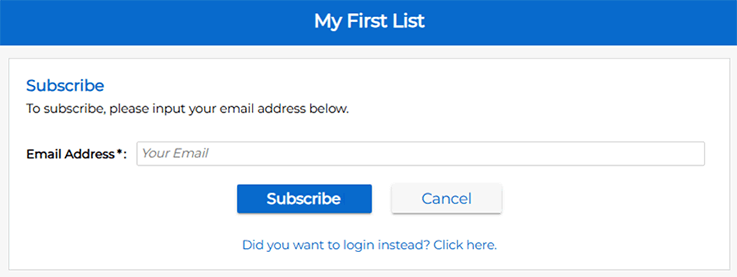
Once your list is configured with the desired profile fields and settings, you can publish a Public Subscriber Website, which is a customizable portal where users can sign up, update their preferences or unsubscribe. By default, this site is private, but you can enable and tailor it to match your branding and communication goals. It has the following layout out of the box:
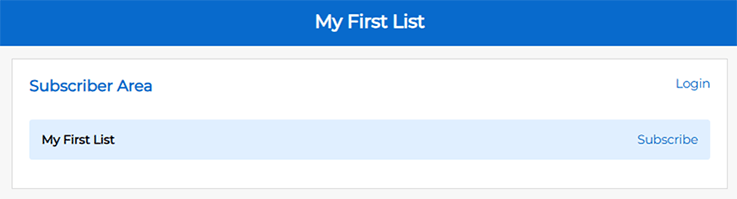
The subscription form looks like this by default:
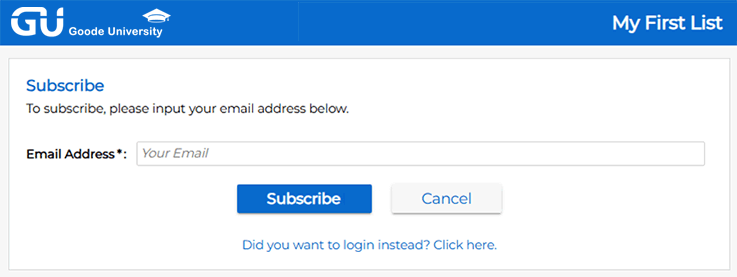
You can fully customize the look and feel of your Public Subscriber Website to match your organization's branding. If you have experience with HTML and CSS, you can go beyond the basics and adjust layout, typography and styling to create a seamless user experience with your main website. Even without coding skills, you can easily upload a custom logo, choose brand colors and edit text elements using the built-in design tools. In just a few minutes, your sign-up page can look like this:
You can further enhance your branding by customizing nearly every element of the subscriber experience. You can add a personalized welcome message that's automatically sent after sign-up and tailor the language and appearance of each screen in the double opt-in workflow.
With your subscriber list set up – complete with custom profile fields and subscribers added manually or through your branded sign-up page – you're ready to launch your first email campaign, known in LISTSERV Maestro as a Mail Job. The process is straightforward.
To create a new mail job, use the main menu and select "New > Standard Mail Job":
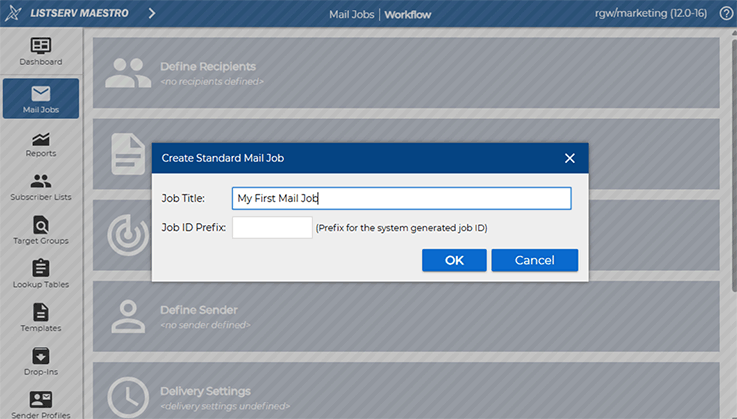
The mail job workflow in LISTSERV Maestro guides you through the process of creating, configuring and sending your email campaign. It's designed to be intuitive, even for first-time users, while offering powerful options for advanced senders.
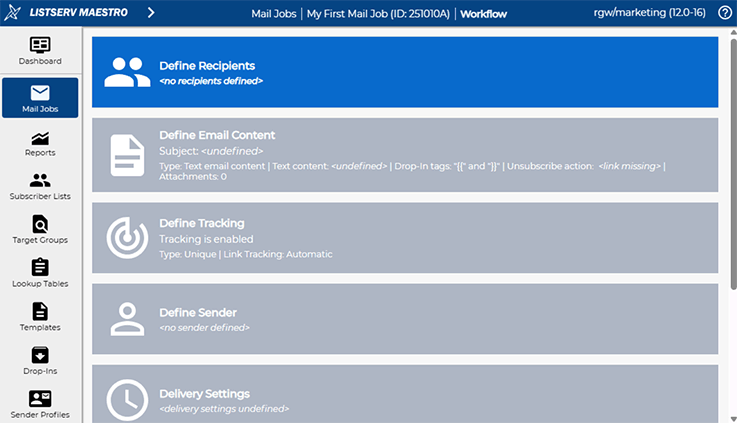
The workflow includes the following steps:
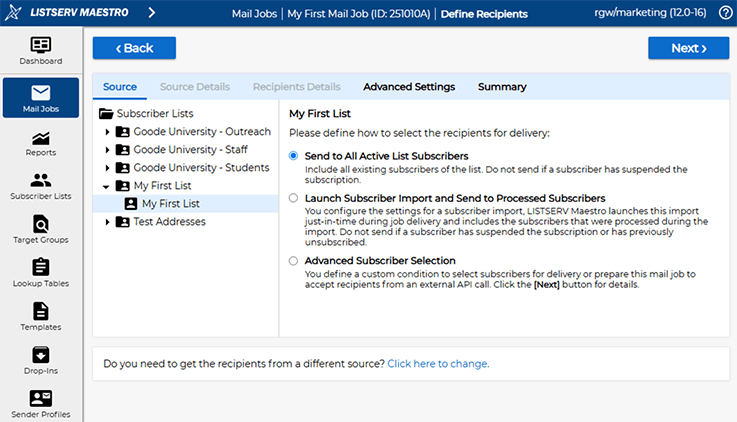
In this example, we'll start by clicking on the "Define Recipients" box and selecting our newly created list.
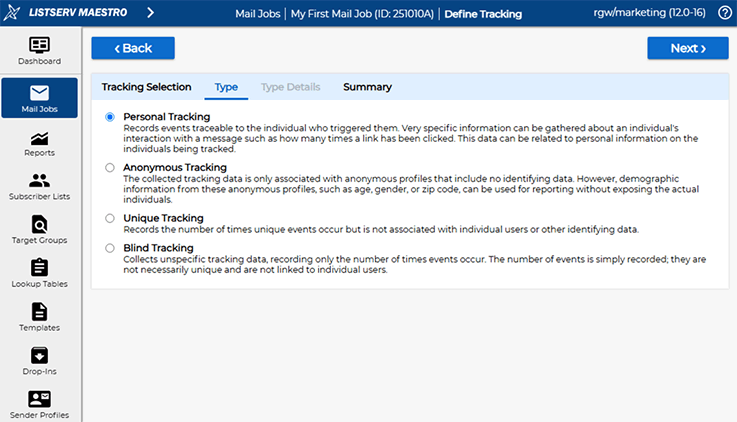
After composing our campaign content, the next step is to configure tracking settings – a critical part of measuring engagement and enabling personalized follow-ups. While the default tracking type, "Unique", provides basic metrics like opens and clicks, it doesn't support behavior-based automation. Since we'll be sending smart follow-up messages based on who opened or clicked later on in this tour, make sure to enable "Personal Tracking" on the tracking type screen.
Then simply follow the remaining steps in the workflow to schedule, test and deliver the mail job.
In Part 2 of this tip, we'll take a look at the reporting and analytics capabilities of LISTSERV Maestro to give you an idea of the wealth of data that you can gather so that you can assess the performance of your email campagins, refine your strategy and improve your results. You'll also learn how to extend this first mail job into an automated, smart multi-step campaign.
Reporting & Analysis |
Advanced Tracking |
Automated Campaigns |
Was this article helpful to you? Would you recommend it to a colleague? Your input helps us create content that truly supports your work. Thank you!
|
Want More Insights? Catch up with the latest LISTSERV developments, industry best practices, expert tips, tutorials and more. |
LISTSERV is a registered trademark licensed to L-Soft international, Inc.
See Guidelines for Proper Usage of the LISTSERV Trademark for more details.
All other trademarks, both marked and unmarked, are the property of their respective owners.