Section 1
Introduction
Section 2
Configuring for First Use
Section 3
Changing Admin Password
Section 4
Creating Accounts
4.2 Continued
4.3 Administrative User Account
4.3.3 Changing Job and Report Ownership
Section 5
Global Component Settings
Section 6
Backups
Section 7
Log Files
Section 8
User Interface Settings
Section 9
Database Connections
Section 10
Non-Standard Ports
Section 11
Firewalls
Section 12
SSL
Section 13
Tracking and Recipient Profiles
Section 14
Editing INI Files
Section 15
Distributed Components
Section 16
User Interface Branding
Section 17
Evaluation Mode
Section 18
International Character Sets
Appendix A
Standard Default Ports
4.2.2 Editing Component Specific Settings for Single and Group Users Continued
Settings available can include any of the following:
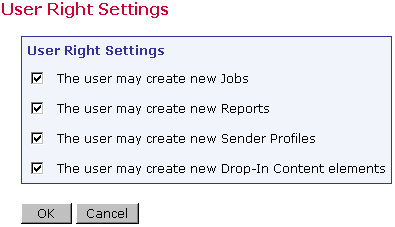
- User Right Settings The user rights apply only to the configured user, even if the user belongs to a group. Check the boxes next to the privileges to be granted to the user. Uncheck the boxes next to the privileges to be revoked from the user. New users will default to having all privileges granted. If certain privileges are revoked, the user will see a slash through the icon(s) in the Maestro User Interface that accesses the corresponding function(s).
Figure 8 User Right Settings
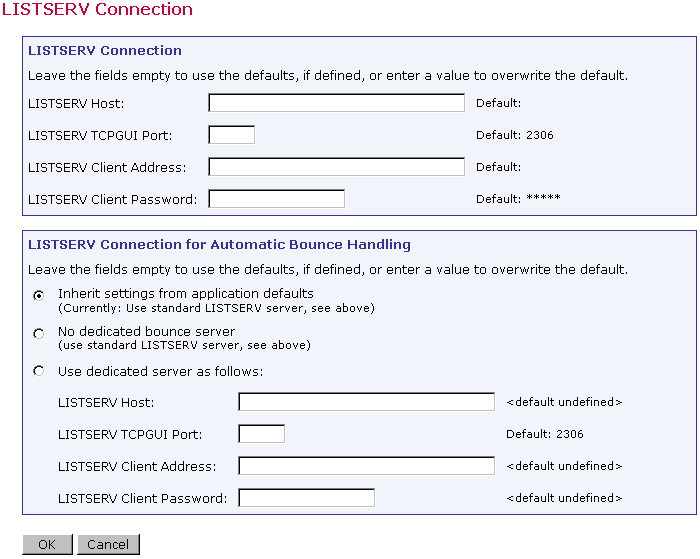
- LISTSERV Connection Specify the LISTSERV connection parameters for the user. This is optional and should be left blank if the default LISTSERV connection parameters are already specified and are going to be used. To set the LISTSERV settings for an entire group in the user list, click on the group name rather than the user name (appears only if the account belongs to a group). Next fill out the LISTSERV connection parameters for that group. This is optional and should be left blank if the default LISTSERV connection parameters are already specified and are going to be used. For more information see Section 8.2 Default LISTSERV Connection for Maestro User Interface
- Tracking URL Enter the Tracker URL for the user. Each user can have a different Tracker URL, although they all lead back to the same tracker component. The domain name must resolve to an IP address on the server where the tracker component is installed.
![]()
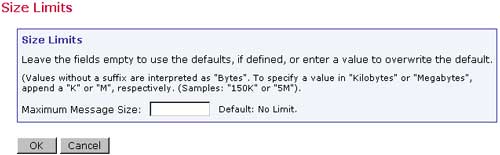
- Size Limits Sets a size limit for e-mail messages and any file uploaded to the system. The size limit for an e-mail message applies to the total byte size of the message (after all transfer encoding and MIME multipart wrappers have been applied). If the message exceeds the size limit, the delivery will fail. The size limit for all uploaded files includes recipient lists, attachments, image files and so on.
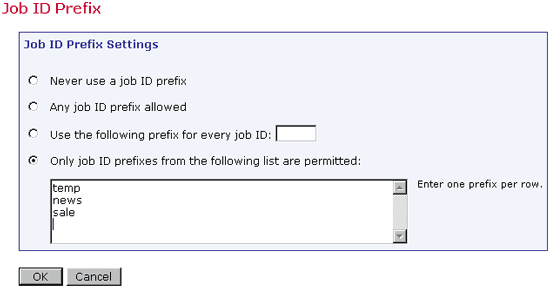
- Job ID Prefix A Job ID Prefix is an optional part of the Job ID. The prefix comes before the system generated Job ID and is separated by a hyphen. Allowing, disallowing or presetting Job ID Prefixes for users takes place by selecting the corresponding radio button and entering the prefix. For more information on job ID prefixes see the LISTSERV Maestro Users Guide, Section 3.1.
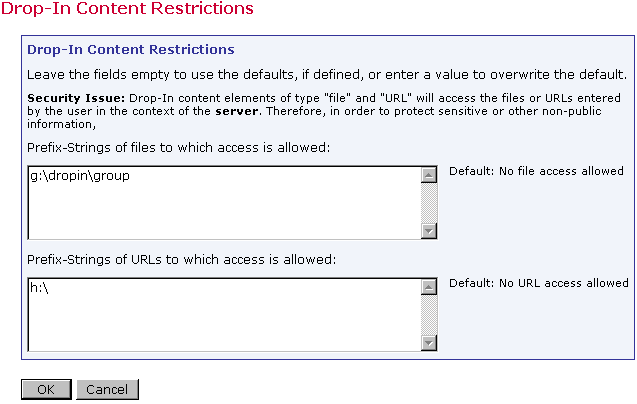
- Drop-In Content Restrictions Create a set of parameters to set up a list of files or URLs that are available to use as drop-in content elements. See the online help for more information on using this setting.
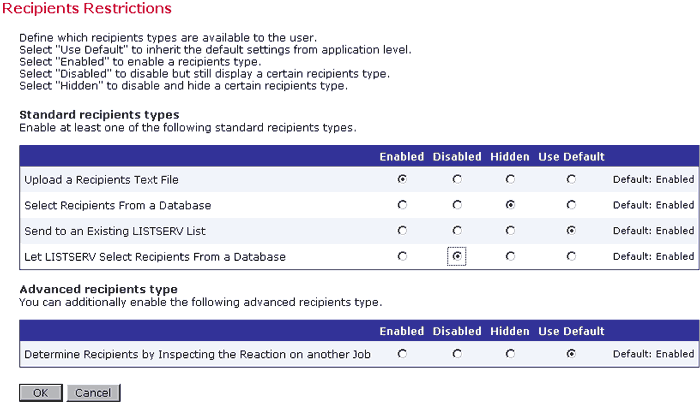
- Recipients Restrictions Sets the type of recipients the user is able to use for an e-mail job. If "Disabled" is selected, the option will appear grayed out in the Maestro User Interface, and the user will not be able to select it. If "Hidden" is selected, the recipient type will be disabled and will not appear at all in the Maestro User Interface.
Figure 14 Recipient Restrictions
To set component settings for a group, click on the group name. The "Group Settings" screen opens and will list the component settings:
- Default LISTSERV Connection
- Tracking URL
- Size Limits
- Job ID Prefix
- Drop-In Content Restrictions
- Recipient Restrictions
The screens that configure these settings are very similar to the screens that configure single user settings. The difference is that settings configured at the group level will affect all members of the group whereas settings configured for the single user will only affect that user.