LISTSERV Maestro Tech Tip |
By Jani Kumpula
Senior Webmaster/User Interface Designer, L-Soft
In the previous issue, we explored how to import externally created newsletters into LISTSERV and turn them into templates so that you can send them to your email lists. In this tech tip, we'll cover how to import externally created newsletters (or newsletter templates created in LISTSERV) into LISTSERV Maestro so that you can add advanced tracking, reporting and analytics capabilities to your email newsletters.
The people who design HTML newsletters in an organization are often not the same ones who are responsible for content creation and distribution. This is what makes templates beneficial because they separate the design from the content. Creating an entire newsletter in an HTML editor can be error-prone because it allows the content creators, who may or may not have strong HTML skills, to not only enter the content but also to modify the layout and design, sometimes by mistake. In contrast, using a template locks the layout and design in place and only allows the content creators to modify specifically designated parts.
The process of importing an externally created newsletter and turning it into a template is similar to LISTSERV except that the code snippets that designate which parts can be edited by the content creators is slightly different.
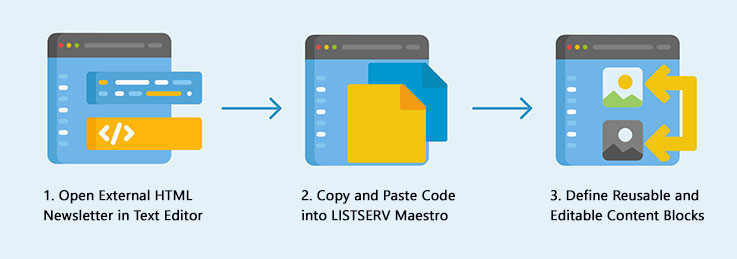
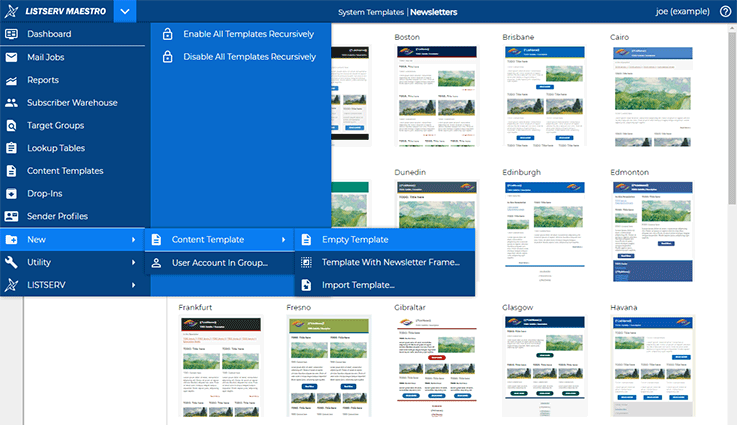
To get started, use the main menu in LISTSERV Maestro and go to "Content Templates". There, you will see all of the built-in newsletter and announcement templates. To import an externally created newsletter, go to "New" > "Content Template", followed by "Empty Template". Note that the "Import Template" option does not apply in this situation because it's used to import templates that have been created in LISTSERV Maestro, perhaps by a different user who belongs to a different user group.
Next, open your external newsletter in a text editor of your choice and copy and paste the HTML source code into the window. You can click the "Design" button to view the newsletter to make sure that you copied all of the code correctly.
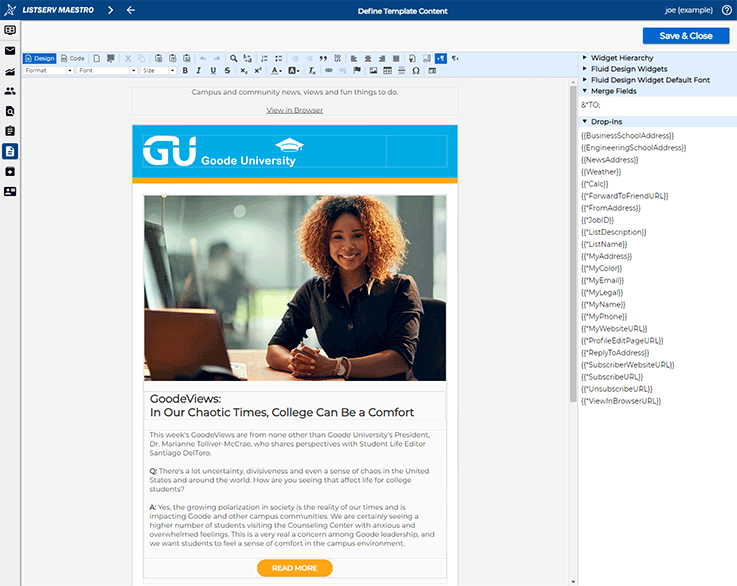
Now, click the "Code" button to switch back and view the source code. In order to turn the newsletter into a template, you need to decide which parts should be editable by the content creators who are responsible for creating and distributing individual newsletters. To make parts of the newsletter editable, we'll add special Maestro tags in the HTML code around the areas that should be editable.
For the preheader part, we'll add the following around the code:
|
<template-editableBlock cloneable="false" conditioneditable="false" deletable="false"> |
This tells LISTSERV Maestro that the content is editable, but the content block cannot be cloned or deleted because we want each newsletter to have exactly one preheader section. The "conditioneditable" attribute defines whether to allow the content creators to enter conditions that determine whether to include or omit the content block for each individual recipient.
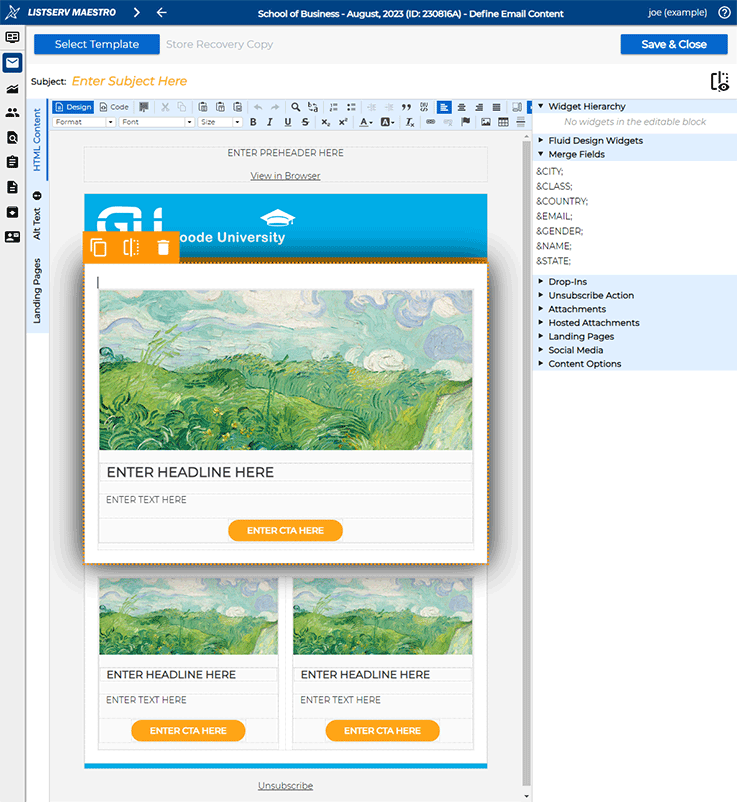
You can also replace the content itself with easy-to-understand placeholders, for example ENTER PREHEADER HERE, so that the content creators can clearly see what they need to work on. Make sure to also replace the "View in Browser" URL with a special system drop-in, {{*ViewInBrowserURL}}, which will automatically be replaced with a custom URL for each recipient upon delivery.
To make the main content editable, we'll insert the following tags around the code:
|
<template-editableBlock cloneable="true" conditioneditable="true" deletable="true"> |
This not only makes that section of the newsletter editable, but we're also allowing the content creators to clone it in case there's a need to have more than one content block of this type in the newsletter. We're also making it deletable in case this content block needs to be omitted altogether. Again, you can replace the content itself with easy-to-understand placeholders like ENTER HEADLINE HERE and ENTER TEXT HERE for the content creators.
As you proceed through the rest of the newsletter, remember to also include the special system drop-ins, {{*UnsubscribeURL}}, as the unsubscribe link. Just like the "View in Browser" link, this will be automatically replaced with a custom URL for each recipient upon delivery. When you are finished, click the "Save" button. You can then rename the template and enable its use by right-clicking on its name and clicking "Enable".
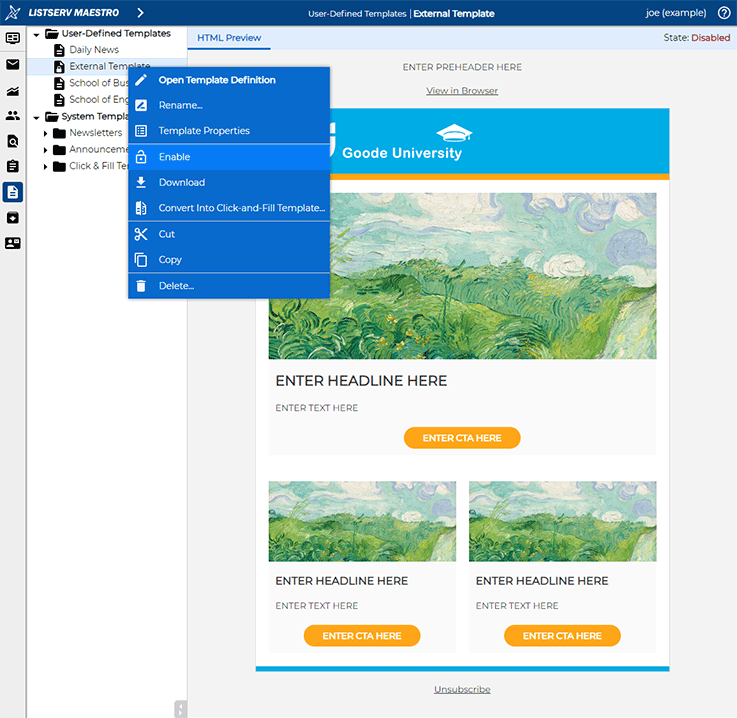
Now, when you go to the content definition screen, you'll find the imported template under "User-Defined Templates". You'll notice that the preheader is editable but not cloneable or deletable. The main content blocks are not just editable, but also cloneable and deletable by clicking on the icons associated with each content block. Anything that you don't explicitly define as an editable block when creating the template is fixed and cannot be modified by the content creators.
Note that you can be as granular as you want with the editable block tags. In other words, you don't necessarily need to place them around an entire content block. You can also place them around just the headline, text or the CTA button to further restrict what the content creators are allowed to edit. This gives you, as the template designer, maximum flexibility for all types of scenarios.
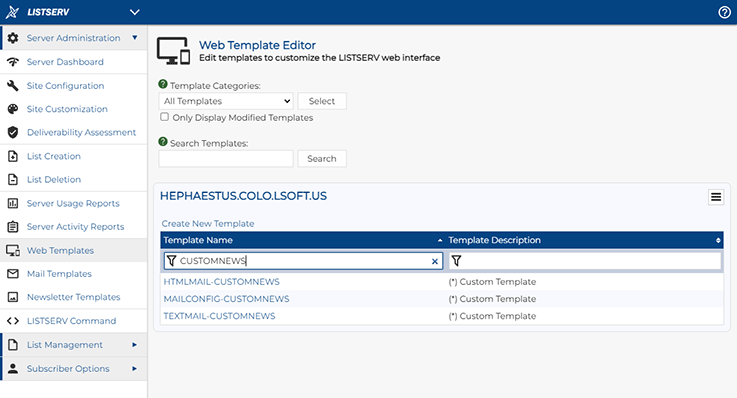
If you have custom newsletter templates that you have created in LISTSERV that you want to import into LISTSERV Maestro, the process is more or less the same. The first step is to locate the HTML source code for your custom template in LISTSERV. To do this, use the main menu and go to "Web Templates" under "Server Administration" if it's a sitewide template, or under "List Management" if it's a list-specific template.
Next, use the filter row in the table and enter the name of your custom template. You will notice three entries associated with your custom template with HTMLMAIL-, TEXTMAIL- and MAILCONFIG- prefixes. Click on the HTMLMAIL- entry.
Then go to "New" > "Content Template > "Empty Template" in LISTSERV Maestro like before and copy and paste the source code into the blank window.
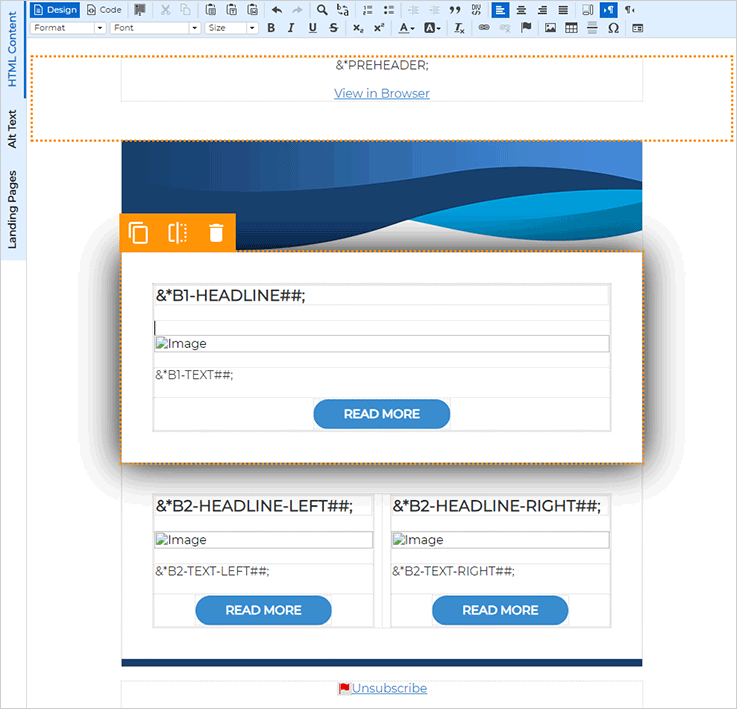
The next step is to replace all of the special LISTSERV tags and conditions that designate the repeatable blocks. You can easily spot them because they are always inside comment tags (<!-- -->) and shown in gray. First, delete the LISTSERV-specific configuration variables in the beginning of the template as these aren't needed in LISTSERV Maestro:
|
<!-- |
Then delete all conditions that begin with +BB and end with +EB, such as these:
|
<!-- |
Then locate the repeatable blocks, which always begin with +REP and end with +ENDREP:
|
<!-- |
Replace them with the same type of LISTSERV Maestro-specific tags as mentioned earlier:
|
<template-editableBlock cloneable="true" conditioneditable="true" deletable="true"> |
For sections that need to be editable but not cloneable or deletable, for example the preheader and footer sections, insert the following tags around them:
|
<template-editableBlock cloneable="false" conditioneditable="false" deletable="false"> |
Finally, make sure to replace the "View in Browser" and the "Unsubscribe" URLs with the system drop-ins {{*ViewInBrowserURL}} and {{*UnsubscribeURL}}. You can optionally also replace the LISTSERV placeholder names with labels, such as ENTER HEADLINE HERE, as we did before, or you can just leave them as is.
Once you are finished, click the "Save" button, rename your template and enable its use. You have now imported your custom LISTSERV template. The content creators can now use the HTML editor to clone and delete each section as configured and to enter all of the content, images and links just like in the above example.
Was this article helpful to you? Would you recommend it to a colleague? Your input helps us create content that truly supports your work. Thank you!
|
Want More Insights? Catch up with the latest LISTSERV developments, industry best practices, expert tips, tutorials and more. |
LISTSERV is a registered trademark licensed to L-Soft international, Inc.
See Guidelines for Proper Usage of the LISTSERV Trademark for more details.
All other trademarks, both marked and unmarked, are the property of their respective owners.