Section 1
Introduction
Section 2
The Maestro Interface
Section 3
Defining a Job
Section 4
Defining Recipients
Section 5
Defining Content
Section 6
Defining Tracking
Section 7
Sender and Delivery Options
Section 8
Outbox
Section 9
Delivered Jobs
Section 10
Reporting and Statistics
10.1.1 Adding a Data Source Continued
10.1.2 Result Settings Continued
10.2 Executing Reports Continued
Section 11
User Settings
Appendix A
24 Hour Clock
Appendix B
International Character Sets
Appendix C
Comma Separated Files
Appendix D
AOL Rich Text
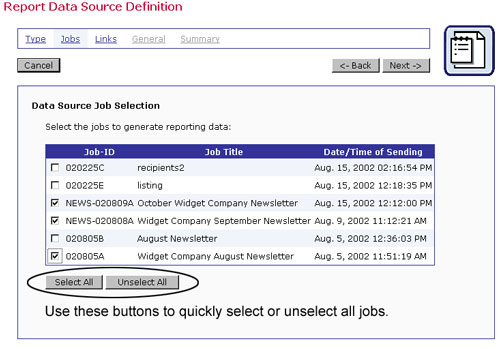
The next screen in the wizard is "Data Source Job Selection". Select the e-mail job or jobs to report on. Only jobs for which the chosen event type is possible will be listed. For example, if only "Open-Up" events were selected on the previous page, then only jobs with open-up tracking enabled will be displayed. Check the boxes next to the job or jobs to include in the data source.
Unlike the "quick reports" from Delivered Jobs, it is possible to combine data from different jobs into one report from this screen. Different jobs can be combined into one data source by checking the boxes for the desired jobs listed under "Job-ID". The data from each selected job is aggregated, and produces one line or bar on the graph. For example, to produce a report that charted the total number of click-through events for three jobs, first select click-through events on the "Type" screen. Next, select each of the three jobs from the Jobs screen. From the Links screen select all the click-through links contained in the job, and on the General screen type in a name for the data source and a color for the line or bar. All of the click-through events from the three jobs would be added together and produce one line or bar on the graph.
To combine data from more than one job into a report where each job is represented by a separate line or bar, a different data source for each job must be created. To do this, using the example above, first select click-through events from the Type screen. Next, select one job from the Jobs screen. Continue through the Links and General screens making the desired selections. Engage the data source wizard again for the second job in the report. Engage the data source wizard for a third time to create the third data source in the report. The resulting graph would have three separate lines or bars, each representing a different job.
Click Next -> to continue.
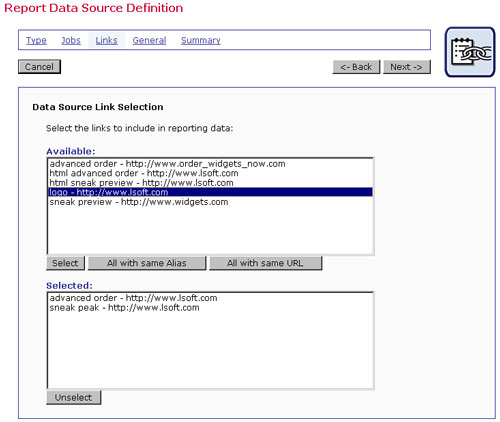
The third screen, "Data Source Link Selection" is only engaged if "Click-through events" is chosen on the "Data Source Type" screen. This screen defines the URLs to report on. To select a URL to generate report data on, click on the link in the "Available:" box to highlight it. Next, click the Select button to place the highlighted link in the "Selected:" box.
Use the All with same Alias button to select a group of links that share the same alias that was defined during the Tracking Definition phase of defining a job. See Section 6.1.2 Defining Tracking URLs for more information. Use the All with same URL button to select a group of links that share the same URL.
To unselect a link, click on it in the "Selected:" box to highlight it. Next, click the Unselect button to replace it in the "Available:" box. To highlight several links at once, hold down the SHIFT or CTRL key while clicking.
Click Next -> to continue.
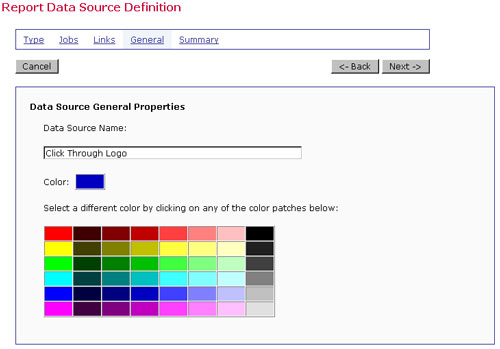
The fourth screen, "Data Source General Properties", defines the name of the data source and the color it will appear as in the graph or data table (as in the case of Recipient Details and Event Details reports). Enter a name for the data source in the text box. Pick a name that will be descriptive of the data source when it is viewed in the report. The name of the data source will be the only way beside color to identify what the source is in the report. Select the color of the line or bar or table for the item that is tracked. For most reports it is usually best to select a different color for every different data source for the report, but it is not necessary.
Figure 62 Data Source General Properties
Click Next -> to continue.
The last screen of the data source wizard is "Summary" A summary of the selections made on the previous pages is displayed. Changes can be made to the data source definition by clicking the <- Back button. Click Finish to save the data source definition and return to the "Define Report" screen. To add an additional data source, engage the data source wizard again.