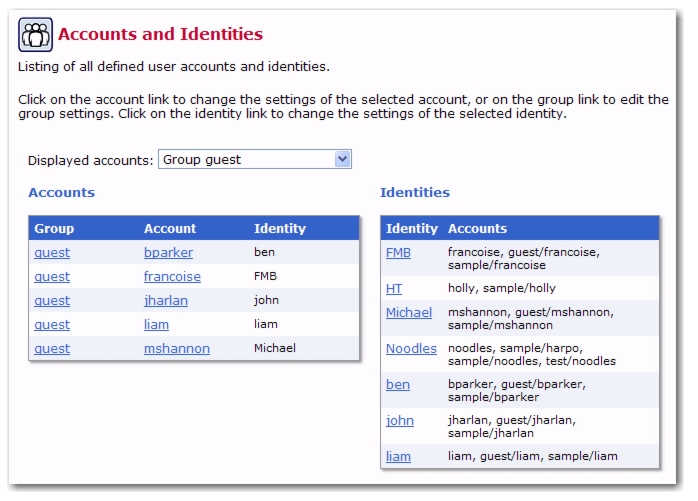
A user account is used for the actual login to LISTSERV Maestro. To be able to login, a user must supply a valid account name (and the account's group name, unless the account does not belong to a group), together with the account's password. Each user account is associated with a certain set of user rights that allow or disallow different actions in LISTSERV Maestro while you are logged in with this account.
An identity is a collection of several accounts which belong to one and the same "identity", usually a person. By collecting all accounts of one person into an identity, LISTSERV Maestro knows that these accounts all belong together. As a result, the user is then allowed to switch between the accounts in the identity without having to perform an actual logout and login. In other words, if a user logs in with one account that belongs to an identity, he can then switch over to all other accounts in the same identity without having to first logout the old account and then login again with the new account (he does not even have to provide the password of the new account). Identities are useful in cases where one and the same person was assigned several accounts for different purposes. The user can then simply log in with one account and perform tasks under this account, then easily switch to any of his other accounts.
Important: Because of this switching between accounts in the identity, it is important not to add any accounts to one and the same identity, between which such a switching will not be allowed.
Each user name is a link that opens the Define User Account screen, and each identity name is a link that opens the Define Identity screen. Links on the Define User Account screen lead to user settings that can be changed for only that single user account. If the user is a member of a group, the group name is a link that opens the Group Settings screen, containing settings that can be changed for the entire group.
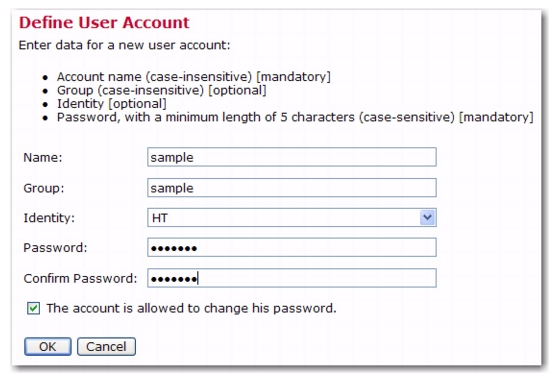
To create a new user account, click on the Accounts and Identities menu and select
New Account. The Define User Account screen opens.
|
•
|
Name – Fill in a user name. User names are not case sensitive, and can be composed of letters, numbers and symbols. User names can also contain spaces. User names must be unique if users are not assigned to a group. Users assigned to different groups may have the same user name as long as the combination of user name and group name is unique.
|
|
•
|
Group – Assign the user to a group, if desired. Groups are optional and can be left blank. However, users must be assigned to a group in order to use the team collaboration features. Only members of the same group can collaborate on email jobs. The combination of user name and group name must be unique. There cannot be two users with the same name in the same group, although there may be two users with the same name in different groups.
|
|
•
|
Identity – Assign the user to an identity, if desired. Identities are optional and can be left blank.
|
|
•
|
Password – Assign a password. All passwords are case sensitive, and must be at least five characters long.
|
Check The user is allowed to change his password if you want to grant the user permission to change his or her password. Uncheck this option to revoke this privilege. Click
[Save] to save the account information and continue. Click
[Cancel] and the new user will
not be created.
Note: If the user is allowed to change his/her password, then the
Change Password option on the
Utility menu in the LISTSERVE Maestro User Interface will be available.
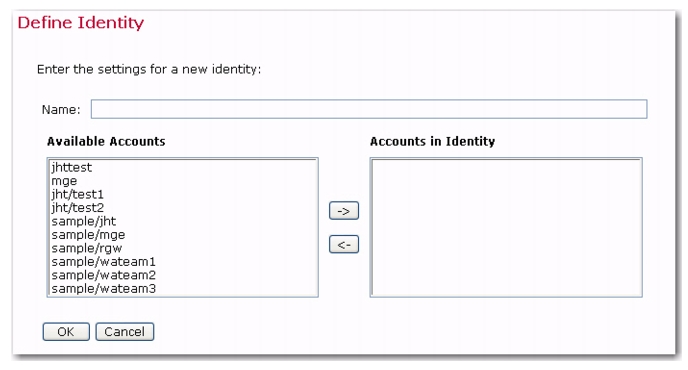
To create a new identity, click on the
Accounts and Identities menu and select
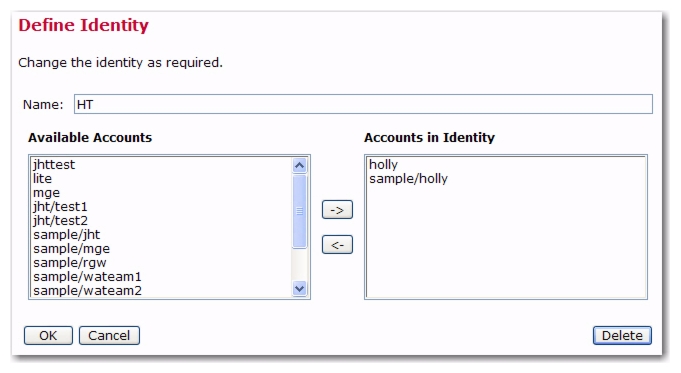
New Identity. The Define Identity screen opens.
Enter the identity’s name in the Name field, and then select the accounts that are in the identity. To add an account to the identity, select it in the
Available Accounts list and click the
[->] button. This will move the identity into the
Accounts in Identity list.
To remove an account from the identity, select it in the Accounts in Identity list and click the
[<-] button. This will move the identity into the
Available Accounts list.
Click [OK] to submit your changes, or click [
Cancel] to exit without submitting your changes.
Important: LISTSERV Maestro interprets all accounts in an identity as related and allows a user to switch between these accounts without providing the login information for each account. In other words, if a user logs in with one of the accounts in the identity, then this user can switch to all other accounts in the same identity without having to know the passwords of these other accounts. Because of this, it is very important that you do not combine accounts into one identity that should not be accessed by the same user.
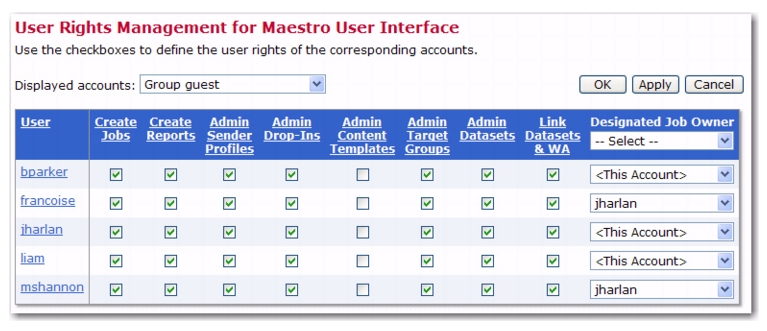
To define the Maestro User Interface user rights, click on the Global Settings menu and select
User Rights. The User Rights Management for Maestro User Interface screen opens.
|
•
|
Create Jobs – Grants the right to create new jobs. If the user is a member of a group with the right to create new jobs, it is necessary to also define who owns the jobs that are created by this account. Jobs can be owned by the account that creates them or by another group member selected from the Designated Job Owner drop‑down menu. If jobs created by one account are owned by another group member, when the user creates a new job, the ownership will be set to the other group member and the team collaboration default preferences of that account are applied.
|
Important: If the owner account of a job that another account tries to create has not given that account at least one right in their team collaboration default settings, then the creating account will not be able to start a new job, and an error message will appear on the Start New Job screen.
|
•
|
Create Reports – Grants the right to create new reports. Existing reports are available for all members in a group.
|
|
•
|
Admin Sender Profiles – Grants the right to create new sender profiles. Existing sender profiles are available for all members in a group.
|
|
•
|
Admin Drop-Ins – Grants the right to create new drop-in content elements. Existing drop-ins are available for all members in a group.
|
|
•
|
Admin Content Templates – Grants the right to create, edit, and delete message templates. Enabled templates are available for all members in a group.
|
|
•
|
Admin Target Groups – Grants the right to administer existing target groups and to create new recipient target groups by providing access to Recipients Target Groups Wizard.
|
|
•
|
Admin Datasets – Grants the right to administer recipient datasets in the recipient warehouse. This includes creating, editing, and deleting datasets, hosted lists, and individual subscribers. It also grants the right to administer target groups.
|
|
•
|
Link Datasets & WA – If granted, the user may create a link between any recipient dataset and the LISTSERV Web Interface of the LISTSERV instance that the user is connected to. For a dataset that is linked, the membership area of the dataset will automatically provide links that allow the subscribers to directly access the list archive pages of the LISTSERV Web Interface.
|
Tip: By clicking on the
User link, then every member of the group will be granted every user right. In addition, by clicking on the name of the user right (e.g.
Create Jobs), then every member of the group will be granted that specific user right.
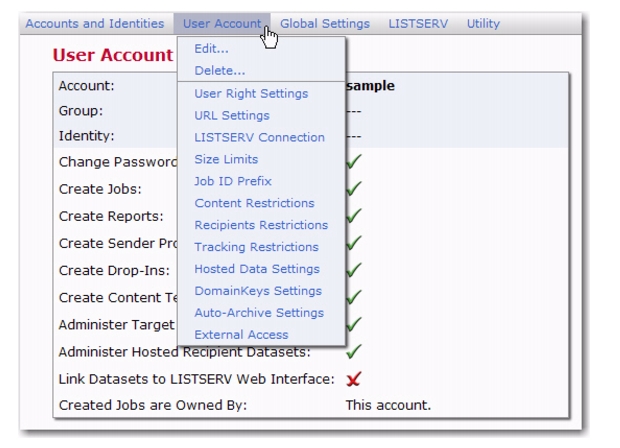
To edit existing account information, go to the Accounts and Identities screen (by clicking on
Accounts and Identities >
Account and Identities Overview). Click on the account name you want to edit. The User Account Overview screen opens. From here, the
User Account menu is available, giving you access to every component of the user’s account.
To change the user name, group, identity, or password of an existing account, click on the
User Account menu and select
Edit. The Define User Account screen opens. To keep an old password while changing other settings, leave both password fields blank.
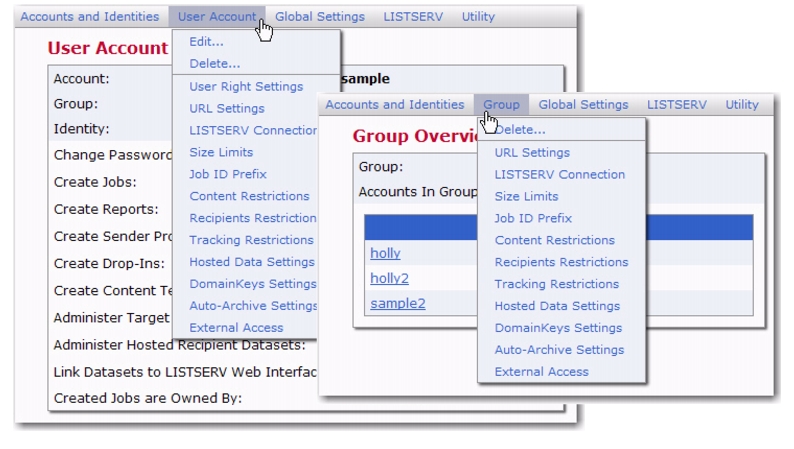
The User Account and
Group menus make it easy to administer specific settings for the the selected account or group.
Click on any of the menu(s) options to open a screen to edit that particular setting. The options and settings on each menu vary slightly. The main difference is that settings configured at the group level will affect all members of the group; whereas, settings configured for the single user will only affect that user.
|
•
|
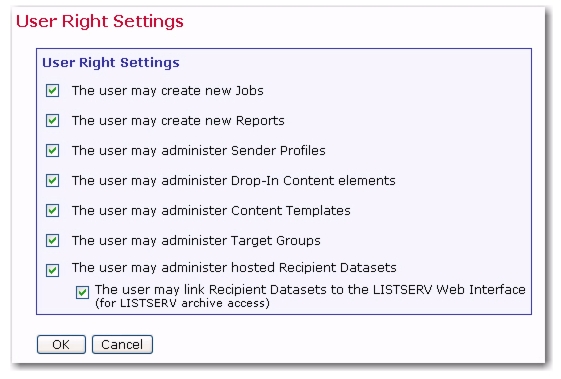
User Right Settings – The user rights apply only to the configured user, even if the user belongs to a group. Check the boxes next to the privileges to be granted to the user. Uncheck the boxes next to the privileges to be revoked from the user. User rights settings include:
|
|
•
|
The user may create new Jobs – Grants the right to create new jobs. If the user is a member of a group with the right to create new jobs, it is necessary to also define who owns the jobs that are created by this account. Jobs can be owned by the account that creates them, or by another group member, selected from a drop‑down menu of existing accounts in the group. If jobs created by one account are owned by another group member, when the user creates a new job, the ownership will be set to the other group member and the team collaboration default preferences of that account are applied.
|
Important: If the owner account of a job that another account tries to create has not given that account at least one right in their team collaboration default settings, then the creating account will not be able to start a new job, and an error message will appear on the Start New Job screen.
|
•
|
The user may administer Target Groups – Grants the right to administer existing target groups and to create new recipient target groups by providing access to Recipients Target Groups Wizard.
|
|
•
|
The user may administer hosted Recipient Datasets – Grants the right to administer recipient datasets in the recipient warehouse. This includes creating, editing, and deleting datasets, hosted lists, and individual subscribers. It also grants the right to administer target groups.
|
|
•
|
user may link Recipient Datasets to the LISTSERV Web Interface – If granted, the user may create a link between any recipient dataset and the LISTSERV Web Interface of the LISTSERV instance that the user is connected to. For a dataset that is linked, the membership area of the dataset will automatically provide links that allow the subscribers to directly access the list archive pages of the LISTSERV Web Interface.
|
|
•
|
LISTSERV Connection – The LISTSERV Connection can be set at several levels. The widest level of setting is the Global Component Setting, which defines the global default LISTSERV Connection on the application level (see Section 5.2 Application Default Settings). These settings will be used as defaults for all accounts that do not have individual settings for group or user level.
|
The next level is the default setting for a group. To set the LISTSERV settings for an entire group in the user list, click on the group name (appears only if the account belongs to a group). If defined on the group level, the group settings will override the global default settings for that group. The settings will apply to all accounts in the group, except for the
LISTSERV Client Address and
LISTSERV Client Password settings. These two settings may be configured individually for each account in the group. Accounts in the group for which they are not configured will use the group's settings as the default.
Individual accounts are the last level of settings for the LISTSERV Connection. Individual accounts can belong to a group (group user) or not belong to a group (single user). Settings for individual accounts will override default group and global settings. To set the LISTERV Connection for an individual account, click on the user name from the user list. The screen that opens is different depending on whether the account is a group user or a single user. Single user accounts can have all LISTSERV Connection settings defined. Group user accounts can only define the
LISTSERV Client Address and
LISTSERV Client Password settings. These individual group settings result in a different LISTSERV email address for each user so that jobs can be identified by owner in the LISTSERV logs.
Notes: To prevent inadvertent sharing between groups, each group should have a separate LISTSERV connection client address and password. For extra security, use a separate LISTSERV instance for each group. Remember that each LISTSERV instance requires a separate license, but multiple LISTSERV instances can run on a single Windows server.
|
•
|
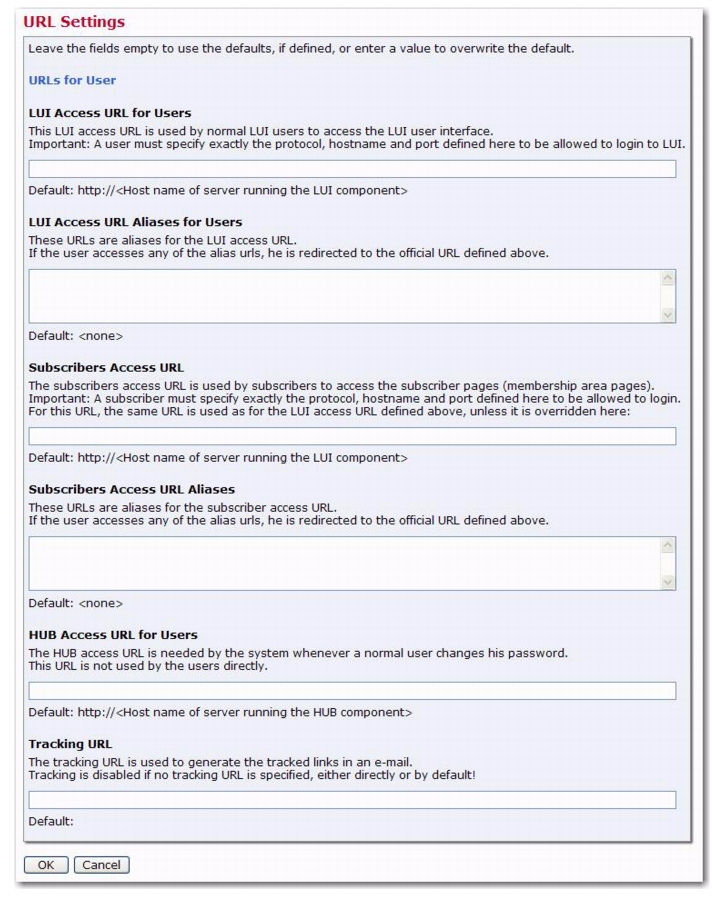
URL Settings – This defines the settings for the various URLs used by LUI.
|
Note: If defined on the application level, then these settings will be used as defaults for all accounts that do not have individual settings on the group or user level. For details, see Section 5.2.1
Default URL Settings.
|
•
|
LUI Access URL – The LUI access URL is used by the LUI users and the admin, to access the LUI user interface. For some LUI interface pages, the system needs to include this access URL on the page itself (for example to create a link). The URL that the system uses for this is generated using the settings supplied here. If a setting is not supplied, the displayed default value will be used.
|
|
|
Specify the Host Name, HTTP Port, and Protocol (either HTTP or HTTPS) that is to be used to generate the LUI access URL.
|
|
|
Only on user/group level: If a LUI server has several host names assigned, then normally a user can use any of these host names to access LUI. If you want to restrict the user to only be able to login when he uses the host name as specified here, check the User must use this host name for login option. If checked, then a login by the user to which this setting applies will only be successful, if the user has used the same host name in his access URL as is specified here. If the user uses a different host name in his access URL, the system will behave as if the user account does not exist.
|
|
•
|
LUI Access URL Aliases for Users – The LUI Access URL Aliases will be the aliases for the LUI Access URL. If a user accesses LUI with any of the alias urls, then their login is accepted, and after login, they will be automatically redirected to the official LUI Access URL.
|
|
•
|
Subscribers Access URL (only available on user/group level) – The subscriber pages access URL is used by subscribers to access the subscriber pages (the pages of the membership area of a dataset). There are various situations in which LUI needs to generate this URL, for example to include an unsubscribe link, login link or forward-to-a-friend link in an e-mail message. The URL that the system uses for this is generated using the settings supplied here. By default, the system will simply use the same settings as are supplied for the LUI access URL (see above). You only need to specify separate values for the subscriber pages access URL if this URL is actually supposed to be different than the LUI access URL.
|
|
•
|
Subscribers Access URL Aliases (only available on user/group level) – The subscriber access URL aliases are the URLs that will be the aliases for the Subscriber Access URL. If the subscriber accesses any of the alias urls, then they are automatically redirected to the official Subscriber Access URL. By default, the system will simply use the same alias URLs that are supplied for the LUI access URL (see above). You only need to specify separate alias URLs for the subscriber pages if these aliases are actually supposed to be different than the LUI access aliases. Make sure to specify a list of alias URLs (one per row), each with the full protocol and hostname, optionally followed by the port. For example,
|
|
•
|
HUB Access URL – The HUB access URL is used behind the scenes to allow the system to display the password change page for normal users, and to allow the admin to switch seamlessly between the LUI and the HUB interfaces. To enable this functionality, the system needs to be able to generate a URL that correctly points to the HUB user interface. The URL that the system uses for this is generated using the settings supplied here. If a settings is not supplied, the displayed default value will be used.
|
|
|
Specify the Host Name, HTTP Port, and Protocol (either HTTP or HTTPS) that is to be used to generate the HUB access URL.
|
|
•
|
Tracking URL – The tracking URL is used to generate the tracked links in e-mail messages for which tracking has been enabled. The URL that the system uses for this is generated using the settings supplied here. If a settings is not supplied, the displayed default value will be used.
|
|
|
Specify the Host Name, HTTP Port ,and Protocol (either HTTP or HTTPS) that is to be used to generate the tracking URL.
|
Important: There is no default for the tracking URL host name. Therefore, as long as no such hostname is defined, tracking is disabled because a tracking URL can not be generated.
|
•
|
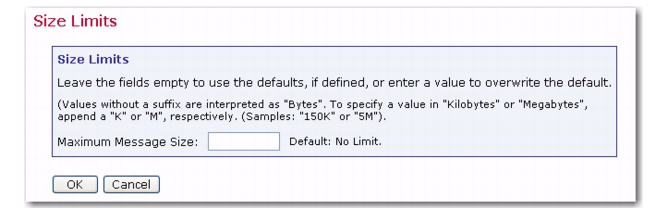
Size Limits – Sets a size limit for email messages. The size limit for a message applies to the total byte size of the message after all transfer encoding and MIME multipart wrappers have been applied. If the message exceeds the size limit, the delivery will fail.
|
|
•
|
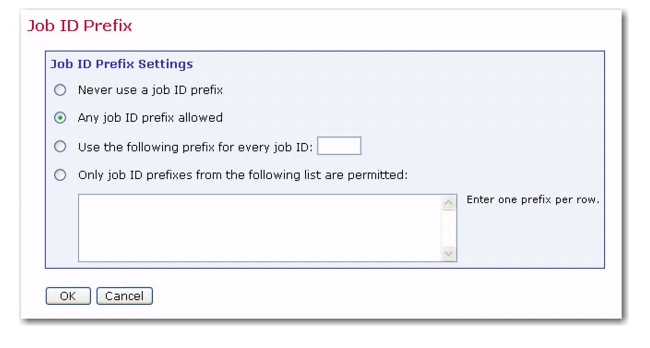
Job ID Prefix – A Job ID Prefix is an optional part of the Job ID. The prefix comes before the system generated Job ID and is separated by a hyphen. Allowing, disallowing, or presetting Job ID Prefixes for users takes place by selecting the corresponding option button and entering the prefix. For more information on job ID prefixes, see the LISTSERV Maestro Users Guide.
|
Tip: Use preset Job ID prefixes to identify jobs from different groups or users more easily. For internal charge-back purposes, the Job ID can be extracted from the job name and base charges on records in LISTSERV's system changelog. If no such identification is necessary, select
Any job ID prefix allowed to give users a way of grouping jobs.
|
•
|
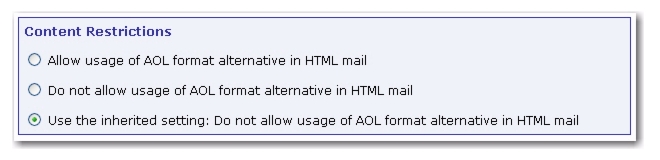
Content Restrictions – This option defines restrictions for the content of email messages. In the top section of the screen, select the option button to allow or disallow an AOL formatted alternative for HTML email messages. For more information on HTML messages, see the LISTSERV Maestro User’s Manual. The AOL alternative is obsolete and not recommended.
|
|
•
|
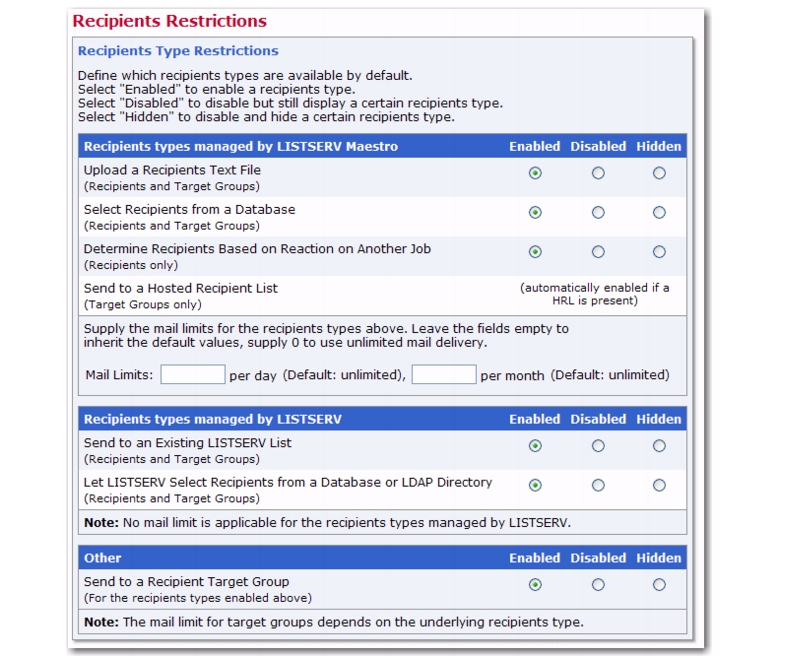
Recipients Restrictions – In the top section of the screen, set the type of recipients available for use for an email job. If Disabled is selected, the option will appear grayed out in the Maestro User Interface, and the user will not be able to select it. If Hidden is selected, the recipient type will be disabled and will not appear at all in the Maestro User Interface.
|
Note: Recipient types that are controlled by LISTSERV (
Send to an Existing LISTSERV List and
Let LISTSERV Select from a Database or LDAP Directory) cannot have email limitations applied to them.
|
•
|
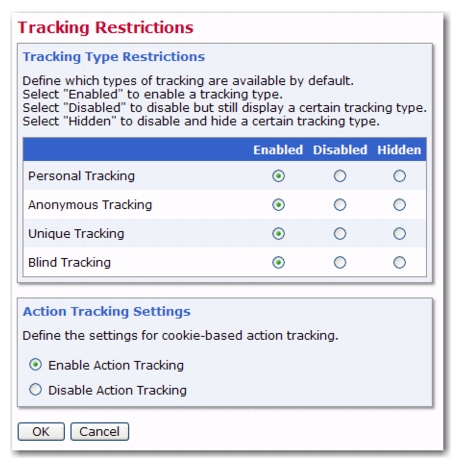
Tracking Type Restrictions – To enable a tracking type, select Enable. To disable, but still display the tracking type, select Disabled. To disable and hide a tracking type, select Hidden. To use the default setting, select Use Default.
|
|
•
|
Action Tracking Settings – To enable action tracking, select Enable Action Tracking. To disable, select Disable Action Tracking.
|
|
•
|
If Hosted LISTSERV Lists will be used, optional suffixes for the LISTSERV lists can be used by selecting the option. Since there may not be more than one list with the same name on the same LISTSERV server, employing automatically generated or individual group/name suffixes for LISTSERV list names prevents list creation errors due to duplicate list names. See the online help for more details about suffixes.
|
Tip: By installing separate LISTSERV instances, and configuring the LISTSERV connection for each user/group to use a different LISTSERV instance, then the use of suffixes is not necessary to distinguish between lists. Separate instances will also give each group a separate LISTSERV Web Interface for their lists.
Note: The
Suffix field is only visible if the
Use individual user/group name suffixes for LISTSERV Lists option was selected while setting up the default hosted data settings. For more information, see Section 5.2
Application Default Settings.
|
•
|
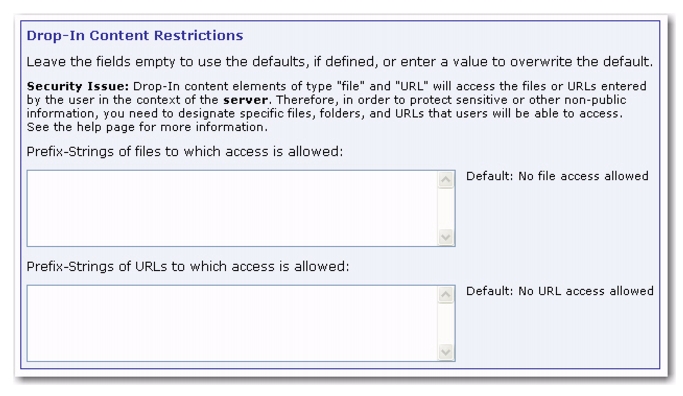
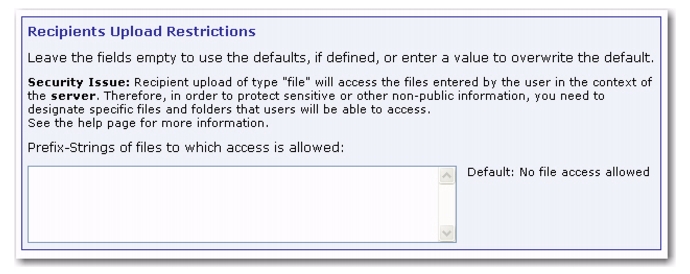
Hosted Data Import Restrictions – Define the file import restrictions and prefix strings for the files that access is allowed for. Access to the server files is restricted and only files that start with one of the prefixes defined are allowed.
|
Important: In the User Interface, the option to import the data from a text file is only available in the Member/Subscriber Importer wizard if there is at least one such prefix defined. Similarly, the option to define an importer that reads from an external database is only available if the
Users/groups are allowed to import hosted data from an external database option is checked.
|
|
A Recipient Importer can either pull data from a database or read it from a file. In the latter case, the file can either be provided by the user at the moment the Recipient Importer is launched, or it can be read from a pre-defined location on the server (defined during importer definition). In addition, a Recipient Importer can be launched manually (from inside User Interface) or externally (with an external trigger, via a URL). Depending on the importer type and the method that is used for launching it, the following will happen:
|
|
•
|
The Recipient Importer reads from a database and is then launched manually. As soon as the importer is launched, it reads the current data from the external database and imports it into the hosted object.
|
|
•
|
The Recipient Importer reads from a database and is then launched with an external trigger. As soon as the importer is launched, it reads the current data from the external database and imports it into the hosted object. (The request to the trigger URL does not contain any additional data, as the data is read from the database.)
|
|
•
|
The Recipient Importer reads from a file that is provided by the user during launch, and then the importer is launched manually. When the importer is launched, the system first asks the user to select a file to upload. This is the file that the importer is supposed to process. Once the file is uploaded (from the user's local system), the importer processes it.
|
|
•
|
The Recipient Importer reads from a file that is provided by the user during launch, and then the importer is launched with an external trigger. The request to the external trigger URL must be a special POST-request that already contains the file data that the importer will process. (That is, the POST-request to the trigger URL is two things at once – it is the actual trigger that starts the importer, and it is also the upload that provides the data for the importer.)
|
|
•
|
The Recipient Importer reads from a file at a pre-defined server location, and then the importer is launched manually. When the importer is launched, it reads the file from the pre-defined location at the server and processes it. The location was pre-defined when the importer was initially created (in the Member/Subscriber Importer wizard).
|
|
•
|
The Recipient Importer reads from a file at a pre-defined server location, and then the importer is launched with an external trigger. When the importer is launched, it reads the file from the pre-defined location at the server and processes it. The location was pre-defined when the importer was initially created (in the Member/Subscriber Importer wizard). (The request to the trigger URL does not contain any additional data, as the data is read from the file on the server.)
|
|
•
|
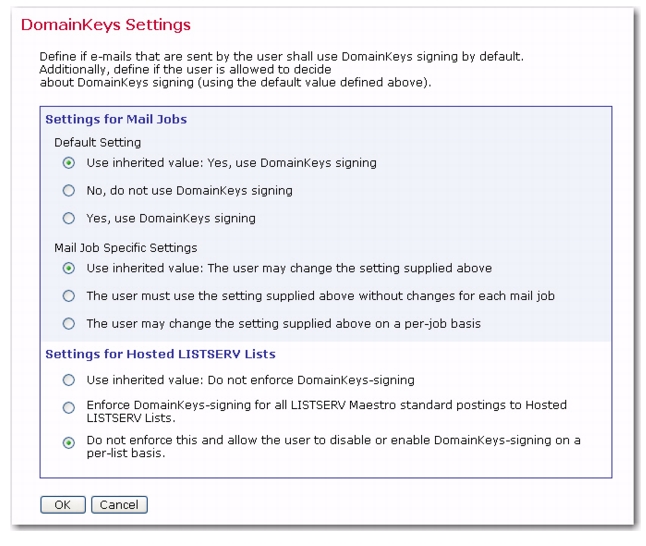
DomainKeys Settings – Define whether or not DomainKeys signatures are used by default, and whether or not the users are allowed to change the default behavior for specific jobs. If defined on the application level, then these settings will be used as defaults for all accounts that do not have individual settings on a group or user level.
|
Digitally signing email messages following the DomainKeys standard is a means to assert that the message originated from the domain that is claimed in the "From:" address. The digital signature is created for the whole message, which has the additional benefit that the recipient (once he or the receiving MTA has verified the signature) can be sure that the message has not been modified on its path from the sender to the recipient. Before enabling DomainKeys support in the application, bear in mind that if DomainKeys signatures are enabled for a mail job, then all messages from the mail job must be run through a signature computation, which in most cases slows down mail job delivery.
|
•
|
Mail Job Specific Settings – Defines whether or not the default behavior for DomainKeys signing can be overridden for specific mail jobs.
|
Note: Changing the settings on this screen only applies to mail jobs that have not yet been authorized for delivery.
|
•
|
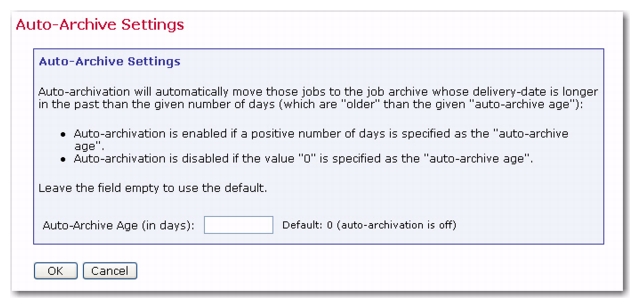
Auto-Archive Settings – Defines whether or not jobs will be automatically archived when the completed job reaches the “auto-archive age”. If the Auto-Archive Age field is set to 0, then the auto-archive setting is off. Leave empty to use the default.
|
|
•
|
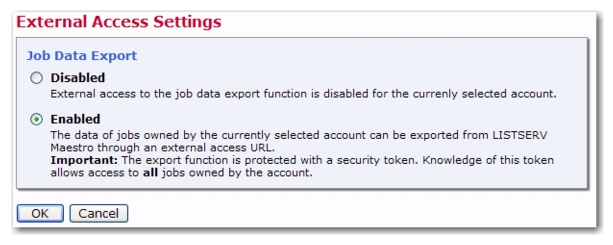
External Access – Defines whether or not the user account or group can export job data through an external access URL. If this Job Data Export feature is Enalbed, then the user account or group can export a specific job or range of jobs, depending on the access parameters. The export is triggered by making a request to an external access URL with corresponding parameters and a security token. The result is an export file in XML format.
|
Important: To protect against unauthorized access during the export process, the export request must include a secret security token. Ever group, and every non-group account, has its own security token. The token is displayed on the Group Overview or User Account Overview screen once the Job Data Export feature is enabled.
Tip: For complete details on exporting your job data into an XML file, please see the online help for the External Access Setting screen, the
LISTSERV Maestro 4.0 What’s New Manual, or the
Exporting LISTSERV Maestro Job Data to an XML File whitepaper.
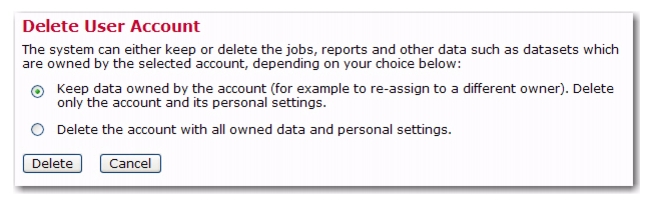
To delete a user account, click on the account from the Accounts and Identities screen. The User Account Overview screen opens. From here, click on the
User Account menu and select
Delete. The Delete User Account screen opens. This screen allows you to delete the currently selected user account. Depending on what kind of a user account is currently selected one of the following options pairs will be available:
|
•
|
Keep data owned by the account: Only the account itself and its personal settings will be deleted. The other data that is owned by the account will not be deleted but will remain in the system as "ownerless". The administrator can then later assign ownership of this data to a different user account or group or can delete the data separately.
|
|
•
|
Keep data owned by this account: Only the account itself and its personal settings will be deleted. The other data that is owned by the account will not be deleted but will remain in the system as "ownerless". The administrator can then later assign ownership of this data to a different user account or group or can delete the data separately. All group owned data will not be deleted either.
|
|
•
|
Keep data owned by the account or group: Only the account itself and its personal settings will be deleted. The other data that is owned by the account or its group will not be deleted but will remain in the system as "ownerless". The administrator can then later assign ownership of this data to a different user account or group or can delete the data separately. The group specific settings will also not be deleted.
|
Click [Delete] to delete the currently selected account with the selected option, or click
[Cancel] to leave the page without deleting the account.
To delete an identity, select the identity from the Accounts and Identities screen. The Define Identity screen opens. From here, click on the
[Delete] button.
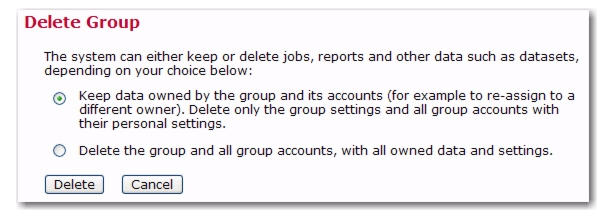
To delete an entire group, select the group from the Accounts and Identities screen. The Group Overview screen opens. Click on the
Group menu and select
Delete. The Delete Group screen opens.
|
•
|
Keep data owned by the group and its accounts: Only the group specific settings and the accounts in the group with their personal settings will be deleted. The other data that is owned by the group or its accounts will not be deleted but will remain in the system as "ownerless".
|
|
•
|
Delete the group and all group accounts, with all owned data and settings: Together with the group and all user accounts in it, all data and settings that are owned by or associated with this group or its accounts will also be deleted.
|
Click [Delete] to delete the currently selected group with the selected option, or click
[Cancel] to leave the page without deleting the group.