LISTSERV Maestro Tech Tip |
Q: How can I create flexible target groups so that I can change the criteria for each mailing?
By Robert Graf-Waczenski
Senior Applications Programmer, L-Soft
The easy point-and-click interface in LISTSERV Maestro allows you to create flexible target groups without special SQL skills. Parameterized target groups provide additional flexibility by enabling senders to select and change their target group criteria on the fly for each mailing. This tech tip shows how to create these types of target groups.
The Benefit of Target Groups
LISTSERV Maestro target groups have been designed to free users from the need to understand the logic and value distribution of profile criteria, especially when the underlying method of retrieval is an external SQL database or LDAP directory. Subscriber lists in the subscriber warehouse may also have a large number of fields with semantics that may not be readily understandable by all users. When creating target groups, the conditions to narrow down your target audience can either be fixed or changeable when setting up your mailing in the recipient wizard.
This tech tip starts with describing how to create a target group without parameters based on selecting a subscriber list only. This target group is then expanded to add a "Country" parameter, allowing you to choose from a list of countries to further narrow down the recipients for your mailing.
Creating the Target Group
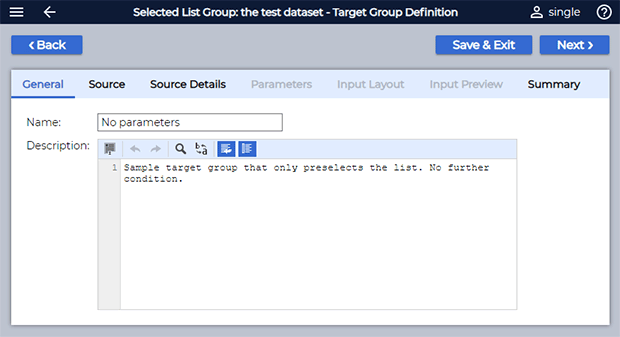
To create a target group, select the "Recipient Target Group" option from the "New" menu. Then enter a meaningful name and description, and proceed by clicking the "Next >" button.
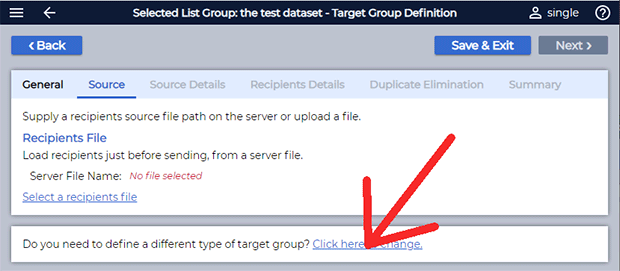
Unlike previous versions of LISTSERV Maestro, the next screen now allows you to decide how to retrieve the recipients for this target group. In some cases, this screen won't yet show the subscriber warehouse, which means that you first have to change the target group's type. To do this, click the link at the bottom.
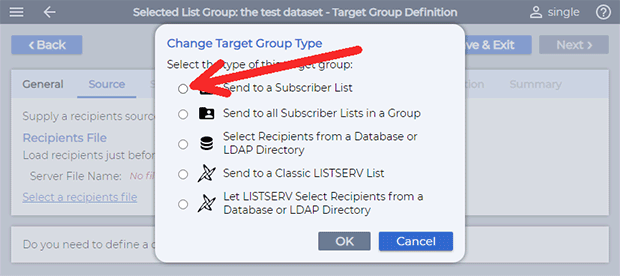
Then select the option "Send to a Subscriber List", followed by the "OK" button.
Note that depending on the settings in your environment, this screen may already show your subscriber lists, in which case you can skip this step.
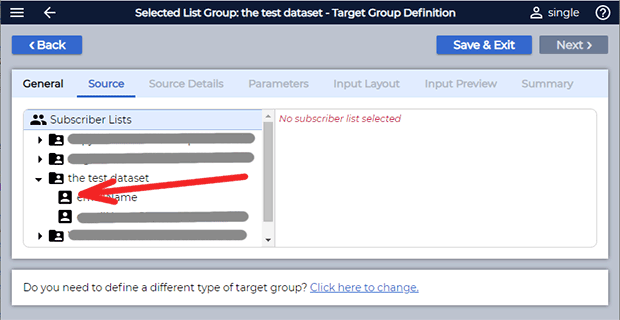
Now select the desired subscriber list (usually, you will have to expand some of the nodes in the tree on the left). Then click the "Summary" link to proceed.
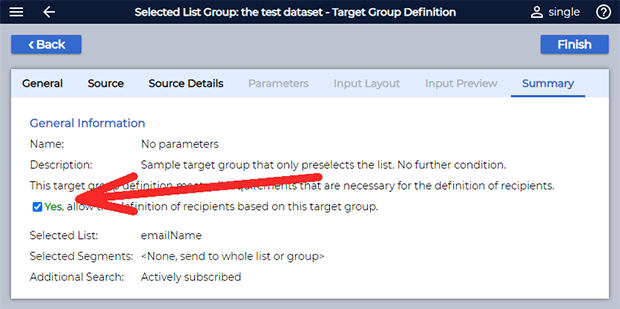
By default, target groups that you create are initially not shown in the recipient wizard. To make your target group appear, check the "Yes" box as indicated below. Then click the "Finish" button to save your target group.
Even though this target group has no conditions and is merely a wrapper around picking the list from the subscriber warehouse, there are some situations where such simple target groups are useful:
- You want to show the subscriber list in the recipient wizard under a different name
- You want your users to benefit from the textual target group description to assist them with selecting the correct list
- You have different types of sources for recipients (a corporate SQL database or LDAP repository, CSV files on the LISTSERV Maestro server, etc.) and you want your users to see a consistent view of all these sources with a unified point-and-click interface
Adding Conditions and Parameters to the Target Group
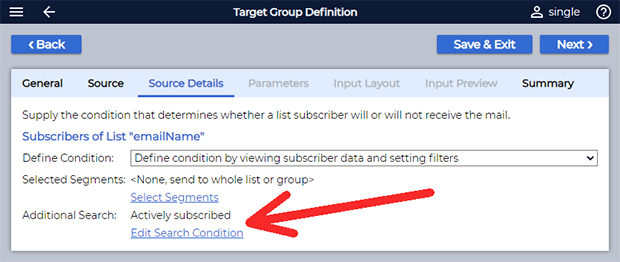
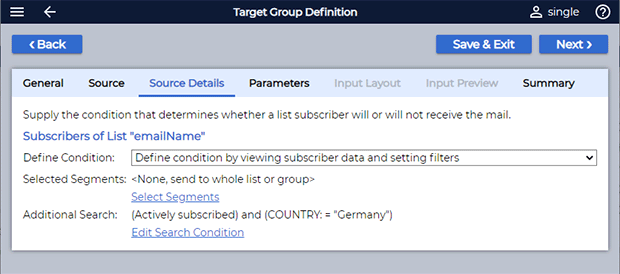
A typical additional setting for a subscriber list target group is defining an "Additional Search" on the source details screen of the target group wizard.
As you'll see, the default search condition of such a target group is "Actively Subscribed", which means that the target group contains all list subscribers unless their subscription status is set to "Suspended". This baseline condition is fixed and can only be narrowed down with an additional search condition.
To further narrow down this condition, click the "Edit Search Condition" link. The following screen opens:
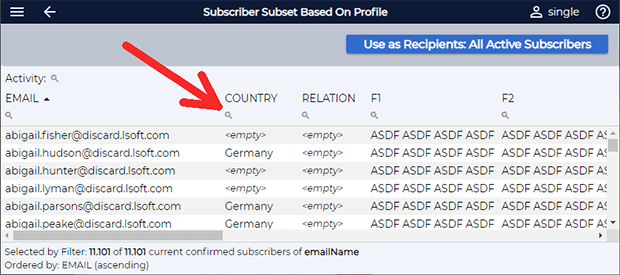
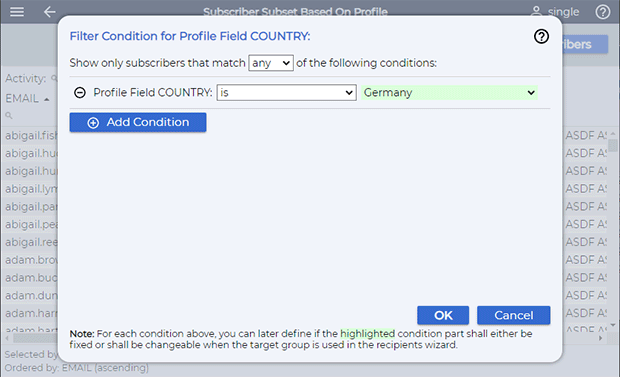
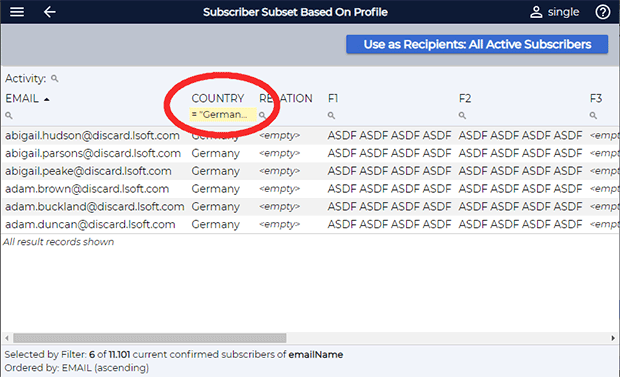
To define an additional condition based on the value of the COUNTRY field, click the filter icon to open the filter settings dialog for the associated field. The filter settings dialog opens with a condition that is initially empty. The following screenshot shows the dialog with the condition on the COUNTRY field defined:
In the screenshot above, the "Add Condition" button has been used to add a condition for the COUNTRY field. This condition has been set to "is" and the value "Germany" has been selected from the lookup table associated with the COUNTRY field.
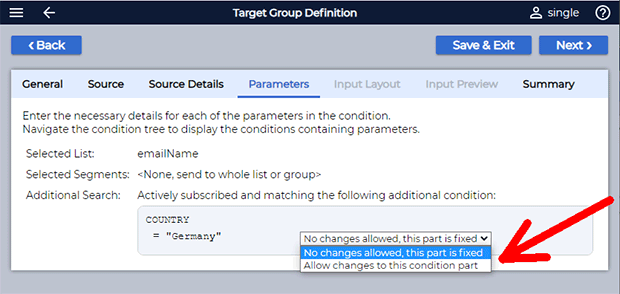
Making the Condition Parameter-Sensitive
You will notice in the screenshot above that the selection "Germany" is highlighted. This indicates that your final target group may, in fact, allow this choice to be changed through a target group parameter with an associated value input in the recipient wizard.
To understand what this means, click the "OK" button. You now see the subscriber list again, but with a slightly different result:
This screenshot shows the subscriber list, which now includes the condition from the filter dialog applied to the COUNTRY field. Click the "Use as Recipients" button in the top-right corner to proceed. The target group wizard is shown again:
Click the "Next >" button to continue.
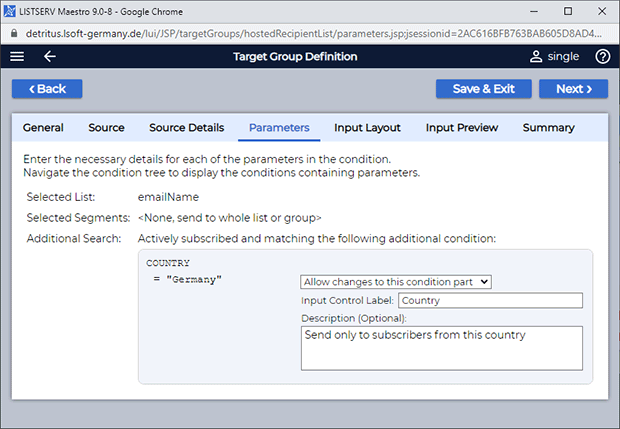
On this screen, you can choose between two options. You can keep the choice that you made for this target group fixed or allow the sender to pick a different country from the lookup table associated with the COUNTRY field in the recipient wizard.
Select the "Allow changes" option and click the "Next >" button to continue.
Then define the input label and description that will appear on the "Source Details" screen in the recipient wizard.
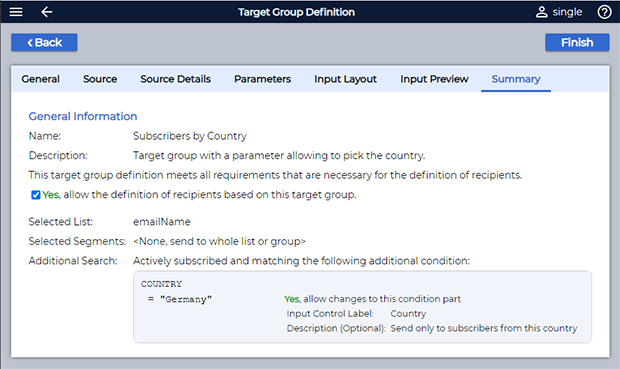
This final screen summarizes the target group settings. Click the "Finish" button to save your target group.
Note that the ability to allow changes to conditions through parameter input in the recipient wizard is neither limited to the specific condition type described above nor to only one parameter input. Basically, any input that you provide for any field in the "Additional Search" filtering condition can be "parameter-sensitive", meaning that the option to allow changes through parameter input is available. This allows you to define target groups with parameter input for:
- The domain part of the subscriber email address
- The lower and upper boundaries for numeric fields
- The time range of the subscription date
- The true/false state for the value of a boolean list field
- ... and many more criteria, based on your needs
Next Steps
|