Q: How do I use the HTML newsletter templates in LISTSERV 16.0?
Answer by Ben Parker
Chief Corporate Consultant, L-Soft
LISTSERV 16.0 introduced the ability for users to easily create professional-looking HTML newsletters. These ready-to-use newsletter templates contain placeholders that let you fill in predefined areas with your own text and images without HTML coding experience. The templates include a plain-text version of the newsletter that is automatically filled in as you complete the placeholders for the HTML version.
LISTSERV 16.0 also introduced HTML Mail Templates, which are thematically related to the newsletter templates in terms of color schemes but are used for a different purpose. The HTML Mail Templates are used to add color and design to many of LISTSERV's regular administrative messages, such as subscription management messages. These templates are found on the Customization > Mail Templates editing page. Do not confuse these with the newsletter templates.
Creating and Sending a Newsletter
To find and use the HTML Newsletter Templates you must of course use the LISTSERV web interface to send the message to your list. Start on the list home page.
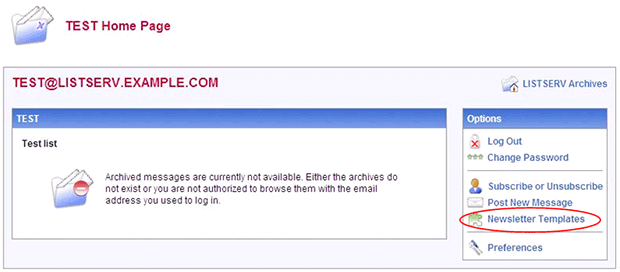
Click on Newsletter Templates. This takes you to the Select Template page and also immediately exposes you to the concept of placeholders and user profiles.
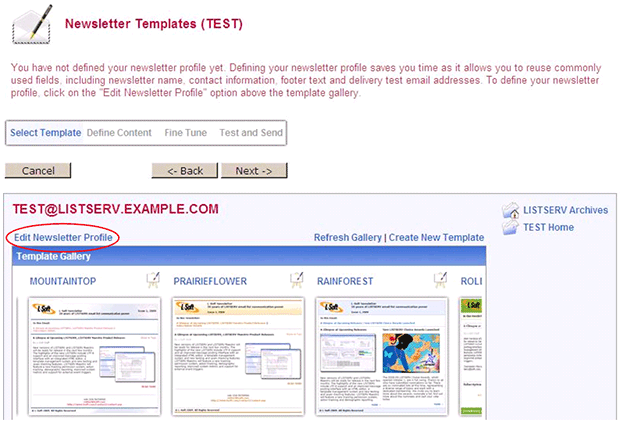
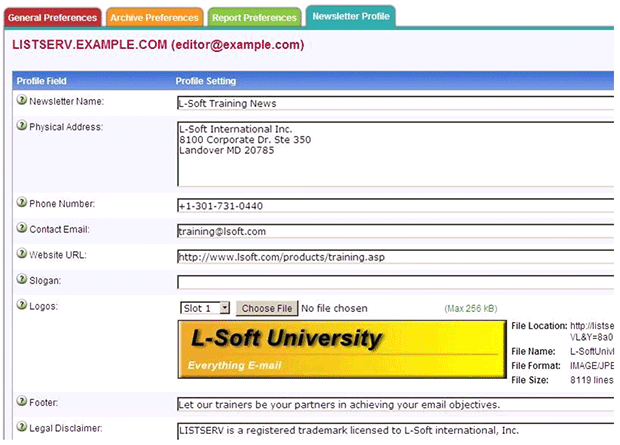
Data for frequently reused fields, like your newsletter logo, title, contact address, website, and so on, are stored in a user profile associated with your login email address. The "From" address of the newsletter is also set by your login email address. Since you probably don't want this to be your personal email address, you will need to create a "role" address. In this case the login address is editor@example.com, and the profile data is stored under this account. If several people in your department or work group share work on the newsletter, you will all need to use this same login address. Note that profile data (and test emails) that you save under your personal email login cannot be moved to another account later. You need to create your role account first and do all of your work under that account.
You only need to enter your profile data once (unless something changes).
Now, with your profile data stored, you can select a template of your choice from those available. Some choices offer a left- and right-sides version; others are centered or use a two-column format. Once you have made your choice, click the Next button under the progress bar to go to the Define Content step.
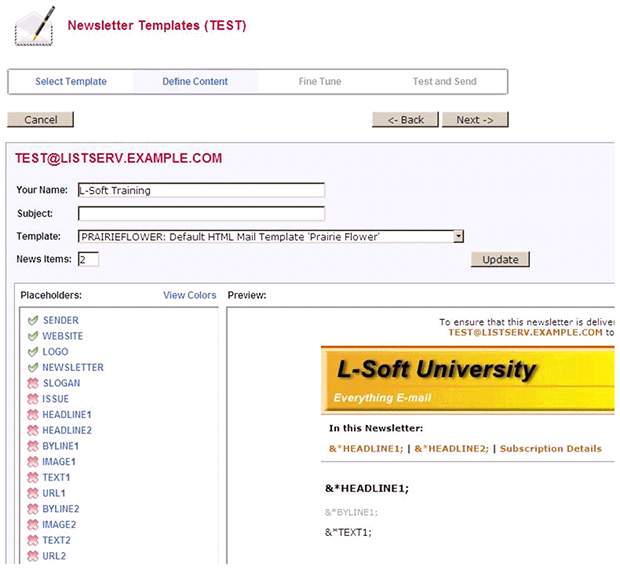
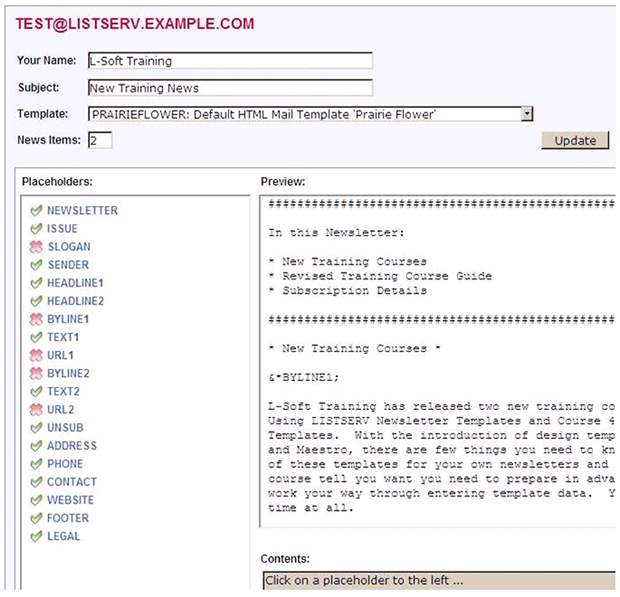
You will see that some of the placeholders are automatically filled in with the data that you stored in your user profile (Green Checkmark). Other placeholders for news articles and changeable data are marked (Red X). Simply click on any placeholder to enter or edit any of the data. If you don't need to use an item (such as BYLINE1 or IMAGE1), simply leave it blank. However, some items (like HEADLINE1 and TEXT1) are required. Note that you can choose the overall number of news items (in this case, two), and this will automatically create the related set of items needed for each article (HEADLINE2, BYLINE2, IMAGE2, TEXT2, URL2). Users of LISTSERV Maestro will quickly realize that this is essentially the same principle used for Maestro's Click-and-Fill Templates.
A special note about images that you want to appear with news articles. If you have recurring images that you plan on using in many future newsletters, you can upload up to 10 images into your newsletter profile. They can be included in your newsletter by referencing the File Location URL from the profile page. For images that are unique to a single newsletter, you should place them on a web server somewhere and reference them by a URL pointing to that location. LISTSERV does not currently allow you to upload images from your local workstation and "attach" them to the newsletter email. However, this may change in future versions.
At any time when you are working on the Define Content stage, you can click the Save button in the lower-right corner to save your work in progress as a draft and return to work on it later.
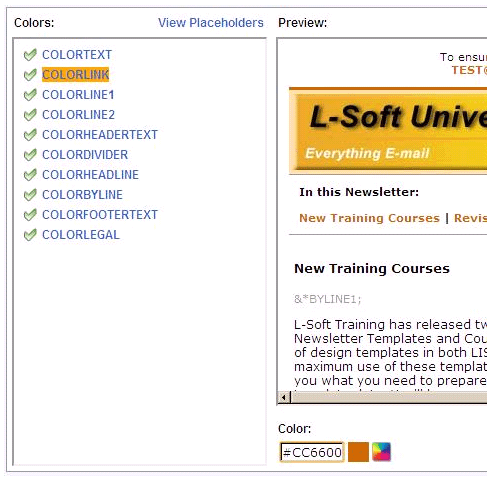
If you click View Colors above the list of placeholders, you can easily edit the HTML color codes if desired.
When you have finished filling in your news article data, look everything over for a final check and then be sure to take a look at the plain text version that has also been created for you. Naturally, this won't have any images or colors, but it can still be meaningful communication for your readers.
When you are ready, click the Next button under the progress bar to go to the Fine Tune step. This step is rather technical as it exposes the actual text and HTML code of the newsletter. If you understand HTML code and feel comfortable making modifications, you can do so here.
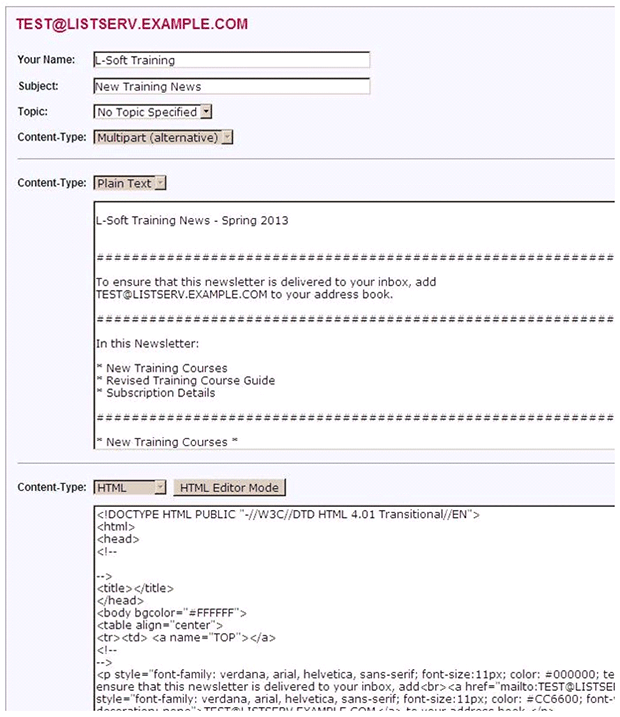
If you don't understand this technical page, simply click the Next button under the progress bar to go on to the final Test and Send step.
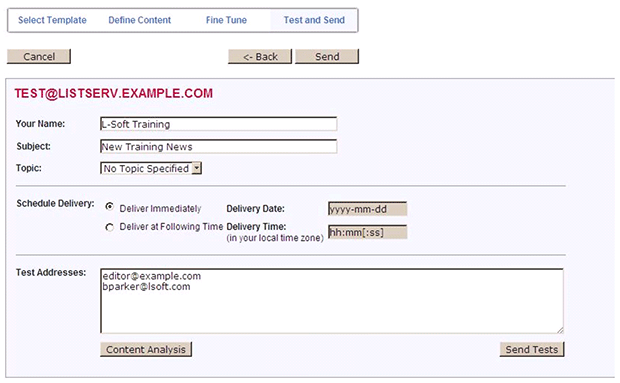
On this final page you can schedule the delivery date and time for sending your newsletter. You can also enter test addresses of people to receive test emails of the newsletter. It is always a good idea to send a test to someone else to review. Fresh eyes will often pick out some small error that you may have overlooked. If you click the Content Analysis button, LISTSERV will perform a spam check of your newsletter contents.
After your newsletter has been tested, approved and scheduled, you can finally click the Send button to send it on its way.
References
Subscribe to LISTSERV at Work.
|