LISTSERV’s Web Interface makes it significantly easier to join or leave a list, change your settings, view your list archives, post messages to your list, and reply to messages from your list.
The Web Interface requires JavaScript to be enabled by default. However, those who prefer not to use JavaScript can set their navigation style to "Non-Script Navigation" in their personal preferences. For more information about preferences, see Section 2.6
Setting Your Personal Preferences.
Note: The Web Interface cannot be used to manage lists that are coded
Validate= Yes,Confirm,NoPW or
Validate= All,Confirm,NoPW because passwords are not accepted for validation in those cases.
|
•
|
On unix: http://yourhost.domain/cgi-bin/wa
|
|
•
|
On VMS: http://yourhost.domain/htbin/wa
|
|
•
|
On Windows: http://yourhost.domain/scripts/wa.exe or http://yourhost.domain/cgi-bin/wa.exe
|
Of course, this is not standardized; the location of the 'wa' script is determined in LISTSERV's site configuration file. In any case, invoking 'wa' without any parameters returns the default home page.
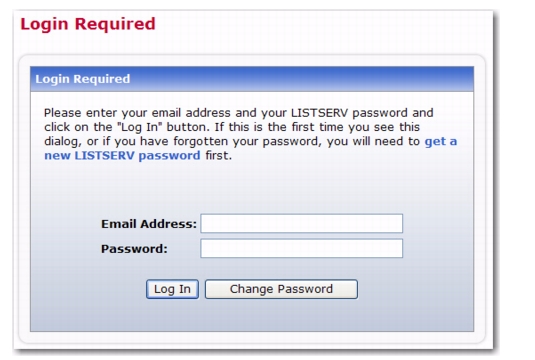
If you login with the "save my password in a cookie" method, LISTSERV will issue you a cookie that allows you to bypass this login screen (and incidentally to stay logged into the interface for longer than 15 minutes without having to log in again when your session expires). This option is, however, only recommended for people who have physically secure machines (for instance, on your machine at home or in your office) or who are able to otherwise keep unauthorized users from logging in since LISTSERV cannot tell who is using the cookie. Specifically, if your browser does not support separate configurations or bookmark files for different users, you should not use the cookie method in a workplace environment.
Notes: There is a known bug in Netscape prior to version 4.0 that allows you to see the userid and password typed into the text boxes if you back up to the login page using the "Back" arrow. The userid you use here must be associated with the personal password you have from LISTSERV. If you have registered a password as joe@unix.host.com and try to log in here as joe@host.com with that password, LISTSERV will reject your login.
Tip: There is a new option for the
Login Cookie Expiration setting on the General tab of your personal preferences so you can decide whether or not you want the login cookie to expire when you close the browser (end the session). This is highly desirable for those who wish to have increased security on shared computers. For details, see Section 2.6.1
General Preferences.
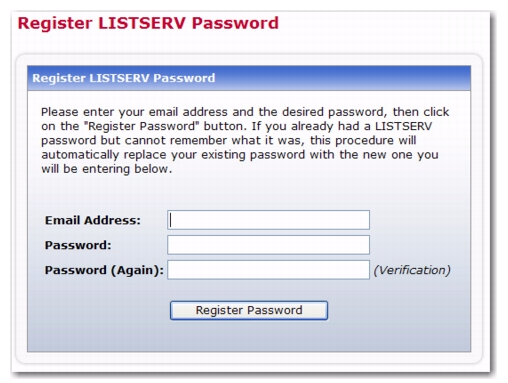
If you do not already have a personal LISTSERV password (set with the PW ADD command or via the Web Interface) or cannot remember your password, you need to define one now. If you choose to do this via the Web Interface, simply click the
Get a New LISTSERV Password link. The Register LISTSERV Password screen opens.
Enter your email and password. Confirm the password by entering it again, and then click the
[Register Password] button. When your password registration is accepted, a confirmation email will be sent to you. You will have to activate your password by responding to the email (or clicking the link it contains).
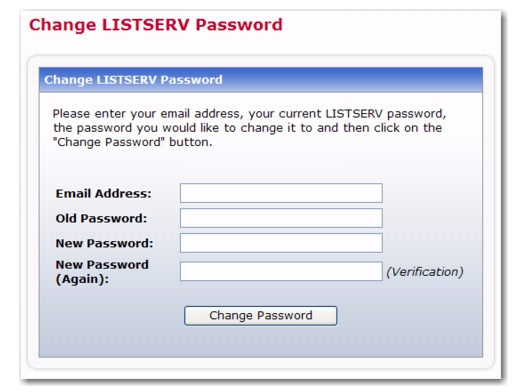
To change your LISTSERV password, click the [Change Password] button on the Login Screen. The Change LISTSERV Password screen opens.
Note: If
Non-Script Navigation is set in your preferences, then the toolbar will only consist of the main topics in LISTSERV. This means that when you click on a topic (i.e.
Server Administration), the Web Interface refreshes and displays the page that was the first option on the Toolbar menu (used with
Pulldown Navigation, which is described in Section 2.6
Setting Your Personal Preferences). For example, the first page for the Server Administration topic is the Server Administration Dashboard. At the top of the Dashboard, the remaining options for Server Administration will be displayed as links. Use these links to view these pages.
The Subscriber’s Corner
option lets you access the lists that you are subscribed to as well as all public lists on the server. For more information on this feature, see Section 3 Working with Mailing Lists.
The Email Lists option takes you to the main list archives page. For more information on this feature, see Section 4
Viewing the List Archives.
The Preferences option allows you to set personal preferences to control the appearance and default settings of the Web Interface. For more information on this feature, see Section 2.6
Setting Your Personal Preferences.
The Logout option logs you out of the LISTSERV Web Interface.
Help pages are accessed by clicking the Help icon at the right side of the toolbar.
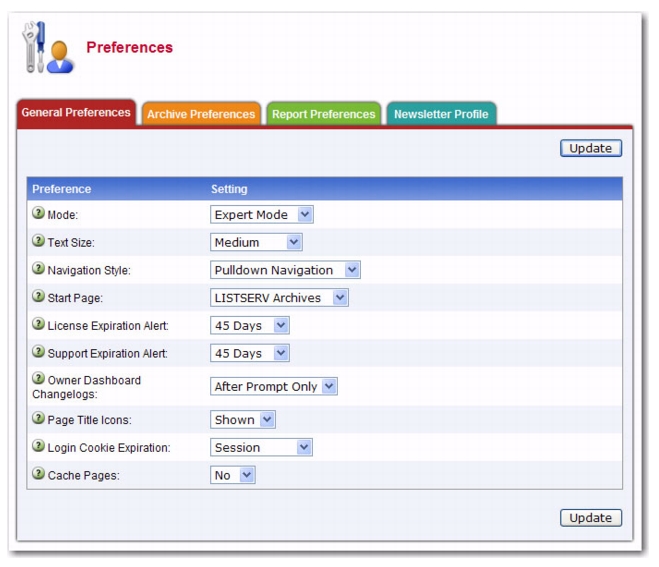
LISTSERV allows you to set personal preferences to control the appearance and default settings of the Web Interface. Your personal preferences are saved with your email address and password, and they will be remembered each time you log in, even if you log in on a different computer.
To change your preferences, click on Preferences from the Toolbar, and then click on the General Preferences, Archive Preferences, or Report Preferences tab. Make your changes, and then click the
[Submit] button.
|
•
|
Mode – Select how you want to view the Web Interface. The mode selected here will be displayed above the Toolbar.
|
|
•
|
If you choose Tutorial, then each web page is displayed with additional text that is meant to guide you through the options on the page. This is the best mode for beginners or for those occasional users.
|
|
•
|
If you choose Basic, then only the most common options are shown, but no tutorial text is displayed. This is the best mode for those users who are familiar with LISTSERV, but who are not experts and do not need to use the more advanced features. This is the default.
|
|
•
|
If you choose Expert, then each web page is displayed with no tutorial text, similar to Basic mode, and certain pages may contain advanced options that are not available with the Basic mode. The Expert mode is available for those users who are very familiar with LISTSERV.
|
|
•
|
Text Size – Select the size of the text for the Web Interface. Your options are Small (main body text is 11 pixels), Medium (main body text is 12 pixels), Large (main body text is 13 pixels), or Extra Large (main body text is 16 pixels). The default is Large.
|
|
•
|
Navigation Style – Select the toolbar style you prefer to work with.
|
|
•
|
If you choose Pulldown Navigation, then the toolbar will consist of javascript-powered drop-down menus. This is the default.
|
|
•
|
If you choose Non-Script Navigation, then the toolbar will only consist of the main topics in LISTSERV. Then, when you click on a topic (i.e. Server Administration), the Web Interface refreshes and displays the page that was the first option on the toolbar menu (used with Pulldown Navigation). For example, the first page for the Server Administration topic is the Server Administration Dashboard. At the top of the Dashboard, the remaining options for Server Administration will be displayed as links. Use these links to view these pages.
|
Note: If you choose
Non-Script Navigation, all javascript throughout the Web interface will be disabled.
|
•
|
Start Page – Select the page that you want to act as your home page when you log in to the Web Interface. The default is LISTSERV Archives.
|
|
•
|
Page Title Icons – Select whether the page title icons should be shown or hidden. It might make sense to hide the icons on low screen resolutions since the conserved vertical space makes more of the page fit on the screen. The default is Shown.
|
|
•
|
Login Cookie Expiration – Select how long you want your login cookie to be valid before it expires. The default is No Expiration, which means that the cookie will not expire until you explicitly log out. This means, for example, that you can close your browser and come back later and you will still be logged in. However, if you are working on a shared computer, for example, it might make sense to set the login cookie to expire for added security. After a time of inactivity, the cookie will no longer be valid and you will need to log in again to continue.
|
In addition, a new Session setting is available so you can decide whether or not you want the login cookie to expire when you close the browser (end the session). This is highly desirable for those who wish to have increased security on shared computers.
Note: Without caching you will not be able to use the "Back" button in your browser to quickly return to past pages. Set this value to
Yes if you prefer quick and easy back navigation and if this additional security is not critical to you.
|
•
|
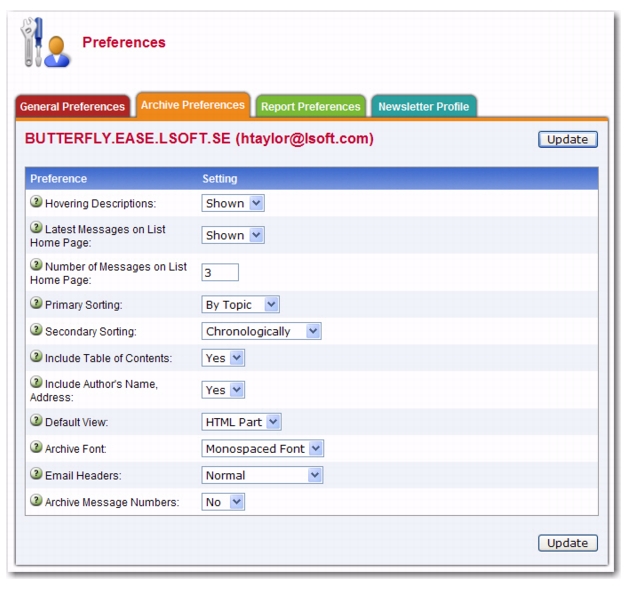
Hovering Descriptions – Select whether you want hovering descriptions containing list descriptions and message abstracts to be displayed in the archives when you move your mouse over the list name or message. The default is Shown .
|
Important: These three new preferences require javascript to function. Because of this, you must also have
Pulldown Navigation selected as your
Navigation Style on the General Preferences tab.
|
•
|
Primary Sorting – Select how you want the archive index to be sorted. The options are By Author, By Date, or By Topic. The default is By Topic.
|
|
•
|
Secondary Sorting – Select the order you want the archive index to be sorted after the messages have already been organized according to the Primary Sorting setting. The options are Chronologically or Most Recent First. The default is Chronologically.
|
|
•
|
Include Table of Contents – Select whether or not you want to include a table of contents in your archive index. The default is No.
|
|
•
|
Include Author's Name, Address – Select whether or not you want to include the author's name and email address in the archive index. The default is Yes.
|
|
•
|
Default View – Select whether to view the HTML or Text part as the default for multi-part messages. The default is HTML.
|
|
•
|
Archive Font – Select how you want the font to be displayed.
|
|
•
|
If you choose Proportional Font, then each character has a different width, depending on their size.
|
|
•
|
If you choose Monospace Font, then each letter has the same width or "pitch". The most common pitch values are 10 or 12. For example, the letter w and the letter i would have the same pitch value; therefore, the word window would look like this using Courier font – window. Notice that the width allotted for the w and the i are the same. Other examples of monospace font are Prestige Elite and Monaco. Monospace font is also the name of a monospaced Unicode font.
|
Note: Proportional Fonts look more professional, but
Monospaced Fonts are often better for data because the fixed width of each character makes column alignment easier. Printed documentation is usually done with proportional font.
|
•
|
Email Headers – Select which headers to view in the archive message viewer.
|
|
•
|
If you select Normal, then only the Subject, Reply-To, From, Date, and Content-Type headers will be shown. This is the default.
|
|
•
|
Archive Message Numbers – Select whether you want individual messages or threads to be numbered in the archive index. The default is No.
|
|
•
|
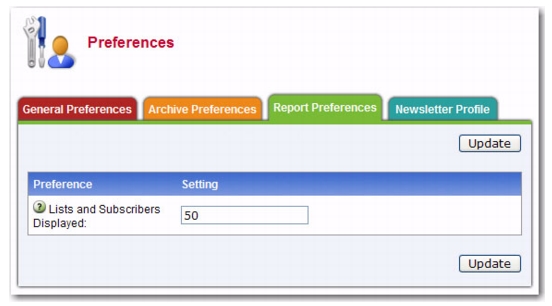
Lists and Subscribers Displayed – Enter the number of lists and subscribers you want to display per page when running any report that displays lists or subscribers. The default is 50.
|
Profile fields that have been defined will be automatically entered into HTML newsletter templates when the system is launched. Not all profile fields need to be defined. You will have the opportunity to change or fill in empty profile fields during the content development stage in the newsletter template system. Empty profile fields will be omitted from the final newsletter.
|
•
|
Newsletter Name – Enter the name of your newsletter. This value will automatically replace the &*NEWSLETTER; placeholders in a newsletter template.
|
|
•
|
Physical Address – Enter the physical address of your company or organization. This value will automatically replace the &*ADDRESS; placeholders in a newsletter template.
|
|
•
|
Phone Number – Enter the phone number of your company or organization. This value will automatically replace the &*PHONE; placeholders in a newsletter template.
|
|
•
|
Contact Email – Enter the contact email address of your company or organization. This value will automatically replace the &*CONTACT; placeholders in a newsletter template.
|
|
•
|
Website URL – Enter the Website URL of your company or organization. This value will automatically replace the &*WEBSITE; placeholders in a newsletter template. Since this field will be clickable in the newsletter, remember to enter the http:// or https:// part before the URL as applicable.
|
|
•
|
Slogan – Enter a slogan for your company or organization. This value will automatically replace the &*SLOGAN; placeholders in a newsletter template.
|
|
•
|
Logo – Upload a logo for your company or organization. This image, which is saved on your LISTSERV server, will automatically replace &*LOGO; placeholders in a newsletter template. You have up to 10 slots where you can upload different logos. The &imgnum= variable at the end of the access URL coincides with the slot number and will determine which logo is inserted into the newsletter. In order for the image to be properly displayed in an HTML newsletter, the logo should be in .gif, .jpg, or .png format.
|
Note: Be careful when changing or deleting existing logos, especially if the logo has already been used in a newsletter because the new logo with the same slot number will replace the old logo in any archived copy.
|
•
|
Footer – Enter a short footer for your newsletter. This value will automatically replace the &*FOOTER; placeholders in a newsletter template.
|
|
•
|
Legal Disclaimer– Enter any legal disclaimers, company registration numbers or similar information for your newsletter. This value will automatically replace the &*LEGAL; placeholders in a newsletter template.
|
|
•
|
Delivery Test Addresses – Enter the list of email addresses to which newsletter delivery tests will be sent, one address per line.
|
|
•
|
HTML Editing – Select the default HTML editing method. Source Code Mode will display the HTML code. HTML Editor Mode will use an HTML Editor.
|