Q: What exactly is drop-in content and how do I use it?
Answer by Ben Parker
Chief Corporate Consultant, L-Soft
LISTSERV Maestro has a number of features intended to save you time and effort as well as reduce mistakes when preparing and sending mail jobs. One such feature is drop-in content. Drop-in content is simply pre-defined, prepared content that can be easily substituted into your message, hence the name.
Drop-in content may be user-defined or pre-defined by the system. Drop-in content might be a disclaimer or informational banner at the bottom of your message. It could be a web analytics tag that you want to add to URLs being tracked, or it could be one of the system-provided drop-ins such as a "View In Browser" link, social media links or an unsubscribe link. Drop-ins are frequently text, but may also include HTML code, referenced images, and so on. Drop-in content is similar to but different from mail-merge substitutions, which are recipient-specific. Instead, drop-ins are job-specific as they are the same for all recipients of a given job.
Defining a User Drop-In
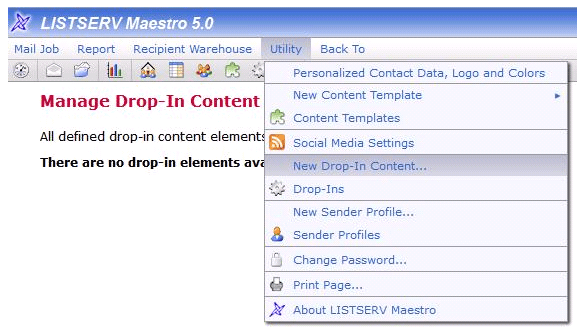
To define a user drop-in, click on the "Utility" menu and then on "New Drop-In Content".
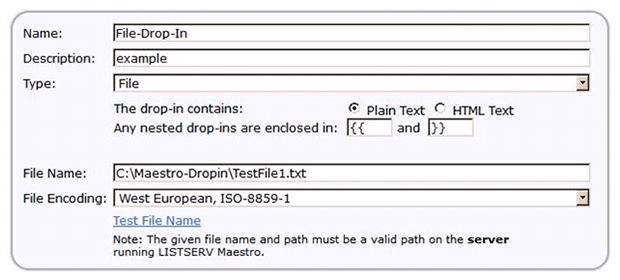
Name your drop-in (case is significant). Add a description and choose the type of drop-in (text for now; we will look at other types later). If your content contains HTML code, click on HTML, then enter your content.
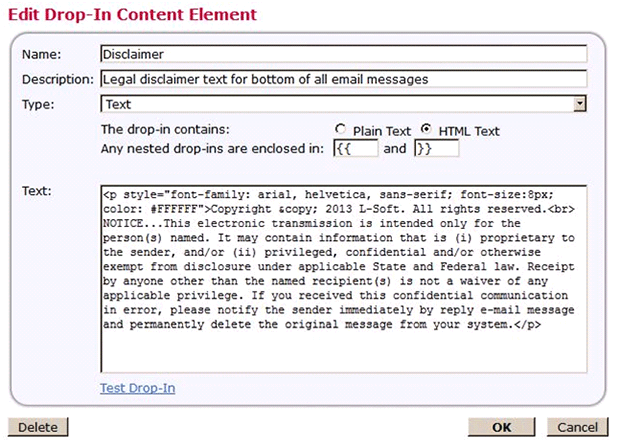
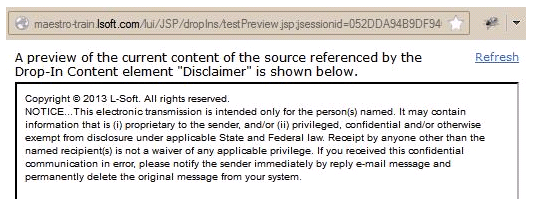
Once you have entered your content, especially if it includes HTML, be sure to click on "Test Drop-In" to preview it as HTML.
Enabling Drop-In Content
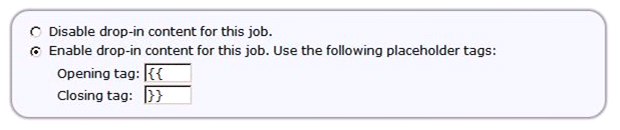
Now that you have pre-defined your drop-in element, you need to enable the use of drop-ins in your messages. In the "Define Message" stage, be sure the "Drop-Ins" box is checked.

This leads you to the actual "Enable" box
Then when you are editing your text, find the place in your document where you want the drop-in to appear.
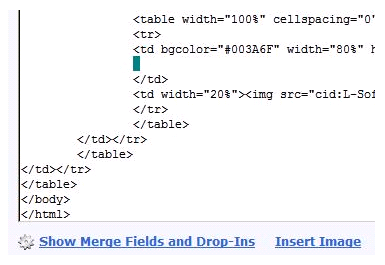
Click on "Show Merge Fields and Drop-Ins", find your drop-in in the list and click to insert it.
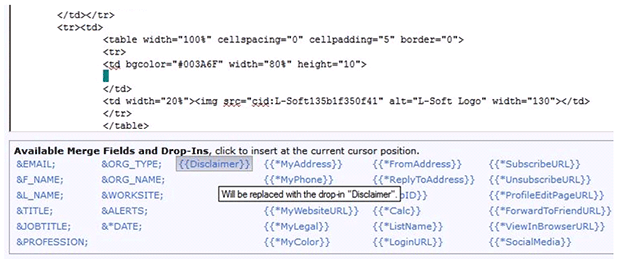
When done editing, you can preview and check your entire document. Note that user drop-ins will be filled in. Personal mail-merge data and system drop-ins will be filled in at the time of mailing, so they cannot be seen now.
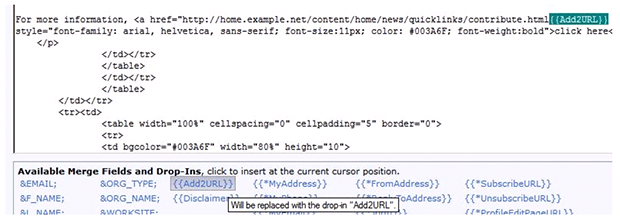
Let's try another example. Suppose you have a web analysis application that needs a couple of defined variables added to every link that you are tracking in your email. Let's say, for example, that you need to add "?ADH=231&CBP=629" to each tracked URL. Create a drop-in named Add2URL (or whatever is appropriate) and use the "click/add" procedure to insert it into your content.
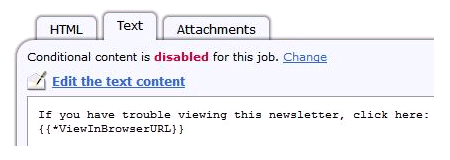
The next example is a good usage for a system drop-in. These are pre-defined by the system and filled in at the time of mailing. For an HTML newsletter, you can substitute a "View In Browser" link for the plain-text copy instead of creating a plain-text version of your newsletter. LISTSERV Maestro can't fill this in yet, but it will be substituted at mailing time with a URL pointing to a full "working" copy of the newsletter served by LISTSERV Maestro.
Other types of Drop-Ins
In addition to plain-text and HTML drop-ins that you type or copy and paste into LISTSERV Maestro, you can pull in content from a text file stored in a designated directory accessible to the LISTERV Maestro server. You can also pull in content accessed via an http:// or ftp:// URL. Many content creation and management systems use this method to distribute their content. Finally, you can access a remote database and pull content from it with a suitable SELECT statement.
However, be aware of certain security considerations with file or URL-accessed content. By default, LISTSERV Maestro will not allow access to outside directories or URLs. The Maestro System Administrator must first grant access to these outside locations or sources by configuring "Default Content Restrictions" in the HUB.
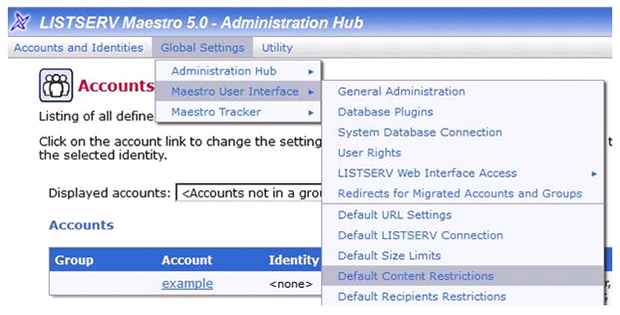
It is as simple as allowing certain base directory paths or base URLs.
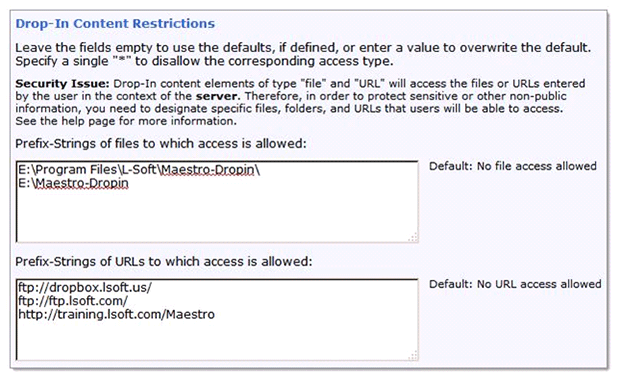
The full directory path including file name must be specified in the drop-in definition for file-type drop-ins. Similarly, the full URL path including http://... and full file name must be given for URL-type drop-ins.
From these simple examples, you should be able to see a number of possible uses to make your use of LISTERV Maestro easier and more productive.
References
1. LISTSERV Maestro User's Manual, Sect. 6.4 Enabling Drop-In Content
2. LISTSERV Maestro User's Manual, Sect. 15.3 Creating and Managing Drop-In Content Elements
3. LISTSERV Maestro Tech Tip: How Can I Use Conditional Blocks to Deliver Customized Messages to Subscribers?
(Although this previous Tech Tip focuses mainly on using Conditional Blocks, it also makes heavy use of nested drop-ins including some using data pulled directly from a database.)
4. LISTSERV Maestro User's Manual, Sect. 16 Advanced Use of System Drop-Ins
Subscribe to LISTSERV at Work.
| 
