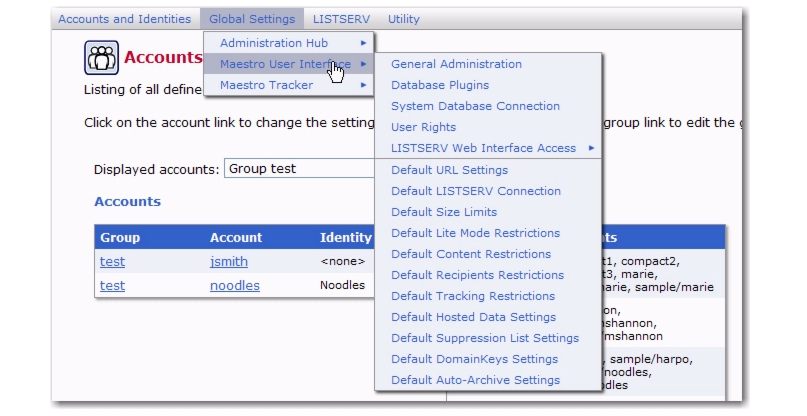
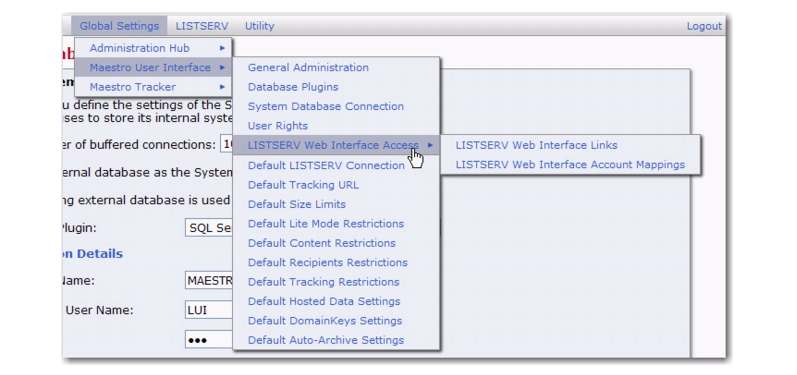
To select settings for the Maestro User Interface, click on the
Global Settings menu, and select the
Maestro User Interface option. The top selections define application settings, and the bottom selections define application defaults. Click on an option to define or edit the settings.
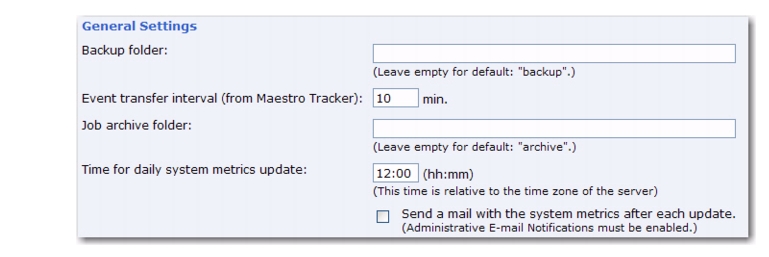
The General Administration setting defines general Maestro User Interface settings. These settings include:
|
•
|
Backup folder – Defines the folder where the daily backup of the Maestro User Interface is written. If left empty, the default backup folder will be used. Use a relative or absolute path. Relative paths are relative to the Maestro User Interface’s home folder.
|
|
•
|
Event transfer interval – Tracking events are initially collected in Maestro Tracker, but before they become available for reports, they need to be transferred to the Maestro User Interface. To prevent the components from being overburdened, these transfers happen in “bursts,” and this parameter defines the time interval between bursts. As a result, there will not be any apparent changes in reports until the next interval has passed, transferring more tracking data from Maestro Tracker to the Maestro User Interface.
|
|
•
|
Job archive folder – Defines the folder where archived jobs are saved. Archived jobs are special ZIP archive files that are removed by the administrator from the Delivered Jobs listing in the Maestro User Interface. If left empty, the folder named “ archive” inside the Maestro User Interface application home folder will be used.
|
|
•
|
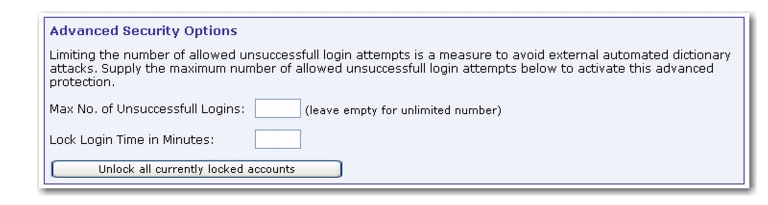
Advanced Security Options – These settings define the number of allowed unsuccessful login attempts a user can have before being locked out of the LISTSERV Maestro User Interface. Using the [Unlock all currently locked accounts], the administrator can unlock all accounts if a user needs to access the User Interface before the “lock login time” has expired.
|
|
•
|
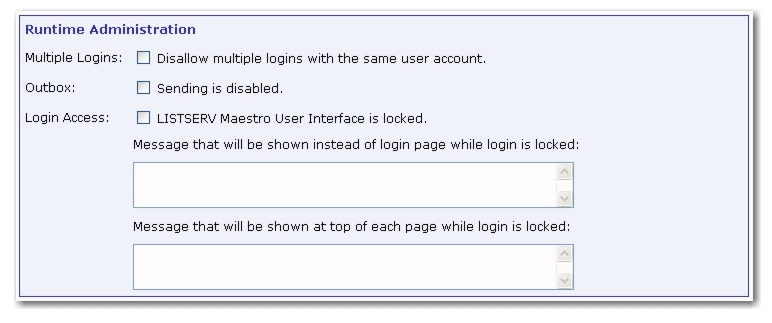
Runtime Administration – These settings allow the administrator to influence the availability of the Maestro User Interface – for example, in the event of a system shutdown. The administrator can disable the Outbox, lock login access, present a message at the top of each screen to logged in users while the login is locked, and create a message that appears to any user trying to login while the login is locked.
|
Tip: Decide on a time slot each week to perform non-emergency maintenance of the server (for example, software upgrades). Let users know about this in advance so they know to avoid sending jobs right before that time slot. When taking the system down for non-emergency maintenance, disable the Outbox and login access an hour ahead (or whatever time seems appropriate) to give the users time to finish their current activities and log out in time.
The Database Plugins setting registers and unregisters database plugins. Database plugins allow LISTSERV Maestro to communicate with databases. For more information, see Section 9.2
Registering a Database Plugin.
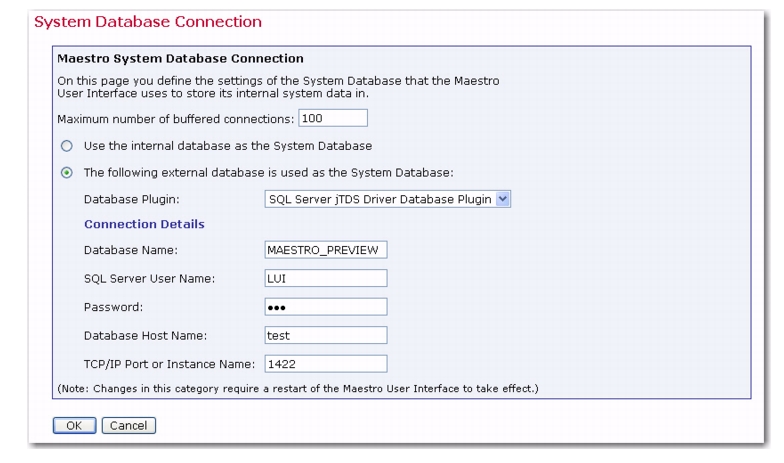
The System Database Connection setting defines the settings for the Maestro System Database. (For more information on the system database, see Section 10
The System Database.) These settings include:
|
•
|
Maximum number of buffered connections – Defines the maximum number of “open” database connections the Maestro User Interface will keep open at any time. After the Maestro User Interface has finished using a connection, it will not close the connection, but keep it open as a buffered open connection.
|
|
•
|
System Database connection choice – Select the Use the internal database as the System Database option to use the internal database (based on MySQL) as the system database. Select the The following external database is used as the System Database option to use an external database as the system database. In this case, select the corresponding database plugin from the drop-down menu. Once a plugin has been selected, a set of input fields will appear. Enter details for the database connection such as server name, database port, database name, user name and password. The exact details depend on the plugin selected.
|
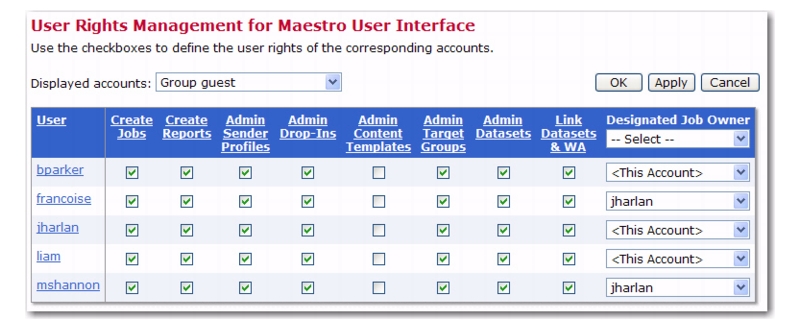
The User Rights setting defines the user rights for corresponding accounts. For more information, see Section 7.3
Managing User Rights.
The LISTSERV Web Interface Access setting configures if and how direct access between LISTSERV Maestro and the LISTSERV Web Interface of the connected LISTSERV instance will be possible. For more information, see Section 22
LISTSERV & LISTSERV Maestro Integration.
Application default settings are used to set system-wide defaults. LISTSERV Maestro will use default settings if no other settings have been entered at the group or user level. To use default settings, leave all other settings at the group and user level blank. If different settings are entered at the group or user level, they will override the default settings.
The Default URL Settings define the settings for the various URLs used by the User Interface, and these settings will be used as defaults for all accounts that do not have individual settings on the group or user level.
Note: A user will only be allowed to login to LUI if in the URL he uses to access LUI, he uses the exact same protocol and hostname (and optionally port) as defined here. If the LUI server has several host names assigned, then using a different host name may successfully display the initial login page, but the login of the user will not be accepted (the system will behave as if the user account does not exist or the wrong password was specified).
This HUB access URL is used behind the scenes to allow the system to display the password change page for users. This URL is not used by users directly. To display the password change page, the system needs to be able to generate a URL that correctly points to the HUB user interface. The URL that the system uses for this is generated using the setting supplied here. If not supplied, the displayed default URL will be used.
Important: There is no default for the tracking URL. Therefore, as long as no tracking URL is defined for a given account or group, then tracking is disabled for this account/group.
Note: The admin will only be allowed to login to LUI if, in the URL he uses to access LUI, he uses the exact same protocol and hostname (and optionally port) as defined here. If the LUI server has several host names assigned, then using a different host name may successfully display the initial login page, but login will not be accepted (the system will behave as if the wrong password was supplied).
Click [OK] to submit and save any changes, or
[Cancel] to exit the page without saving your changes.
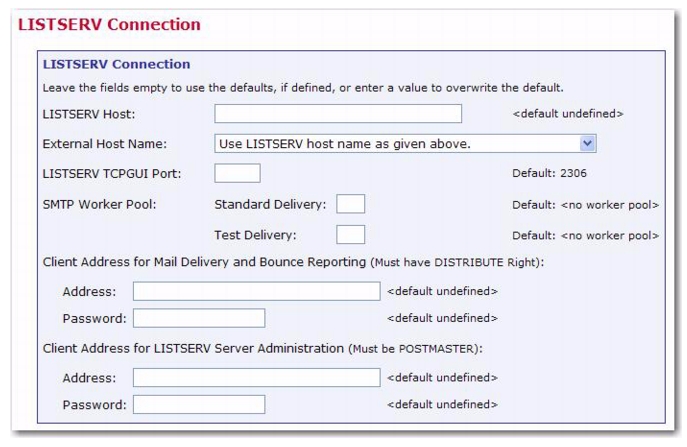
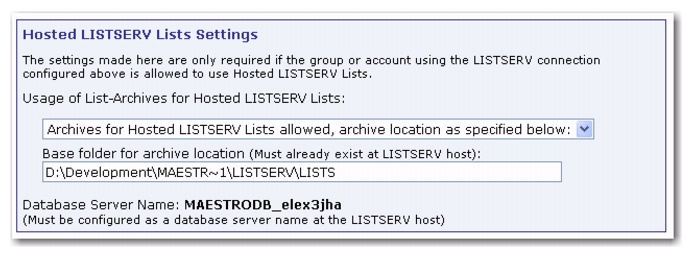
The Default LISTSERV Connection setting defines the default LISTSERV connection, the default settings for LISTSERV Hosted Lists, and the LISTSERV Connection for automatic bounce handling. The default setting is used for all accounts that do not have single user or group LISTSERV connections defined. LISTSERV settings defined at the user or group level will override the default settings for only those users or groups. As a result, it is possible to have some users and groups using the default LISTSERV settings and other users and groups using settings defined at the user or group level.
Note: If there will be several unrelated groups, it is recommended not to define default settings for client addresses and passwords, as each group should use a separate address, defined in the group’s LISTSERV Connection settings. If each group will access a separate LISTSERV instance, do not specify any default LISTSERV connection information.
|
•
|
LISTSERV Host – Enter the host name of the server that is actually running LISTSERV. LISTSERV Maestro will use this host name to look up the server running LISTSERV and connect to it using the TCPGUI port. Do not use a server name or alias that only appears to the outside clients to be running LISTSERV, such as the SMTP server name. For more information, see Section 4.2.1 Specifying the LISTSERV Host with Different Internal and External Names.
|
|
•
|
LISTSERV TCPGUI Port – Enter the port number on the LISTSERV host where LISTSERV listens for TCPGUI connections. The default is 2306.
|
|
•
|
SMTP Worker Pool – Lets you specify a LISTSERV worker pool to use for specific delivery situations. You can specify different worker pools for standard deliveries and for test deliveries. Worker pools are an advanced LISTSERV feature, see the LISTSERV documentation for details. Leave the field empty to use the displayed default. The system default is "no worker pool", i.e. normal distribution by LISTSERV. If you do not know what worker pools are or what they are used for, you should always stick to this system default.
|
Notes: This is not the address that will be used as the “From” address of the actual email messages sent to the recipients; that type of address is defined for each individual email job during the creating of the job.
This address must be configured at the LISTSERV instance to have the right to DISTRIBUTE jobs. To do this, the LISTSERV configuration file must be set up to grant the right to send DISTRIBUTE jobs to this address (it must be listed in one of the POSTMASTER or DIST_ALLOWED_USERS configuration parameters). For more information, see the LISTERV documentation.
|
•
|
Address – This should be the email address that was added as a POSTMASTER in the LISTSERV Site Configuration file.
|
|
•
|
Password – Enter the LISTSERV password that was registered for the Client Address entered above.
|
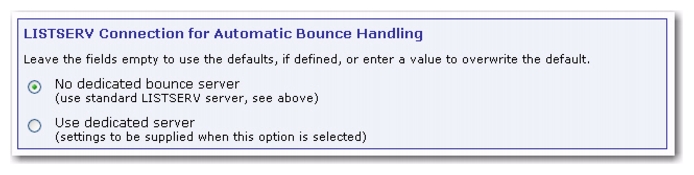
In high volume environments, a special LISTSERV instance that is dedicated to handling bounced mail may be used. If this is the case, select
Use dedicated server and then define the settings of this second LISTSERV instance in the lower fields. For more information, see Section 4
LISTSERV and LISTSERV Maestro.
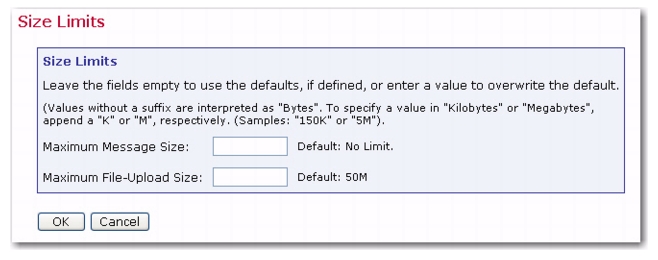
The Default Size Limits setting sets a size limit for email messages and any file uploaded to the system. The size limit for an email message applies to the total byte size of the message (after all transfer encoding and MIME multipart wrappers have been applied). If the message exceeds the size limit, the delivery will fail. The size limit for all uploaded files includes recipient lists, attachments, image files, and so on.
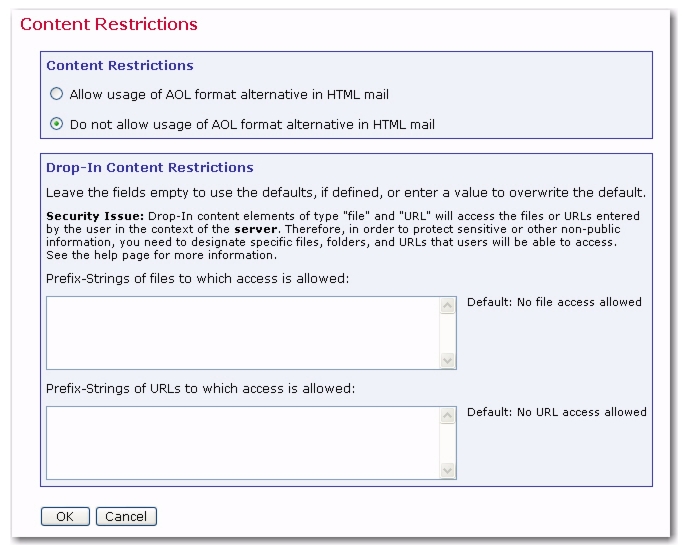
The Default Content Restrictions setting defines AOL Rich Text settings for an alternative part of an HTML message. (The AOL Rich Text setting is obsolete and not recommended except in special cases.) Create a set of parameters to set up a list of files or URLs that are available to use as drop-in content elements; see the online help for information.
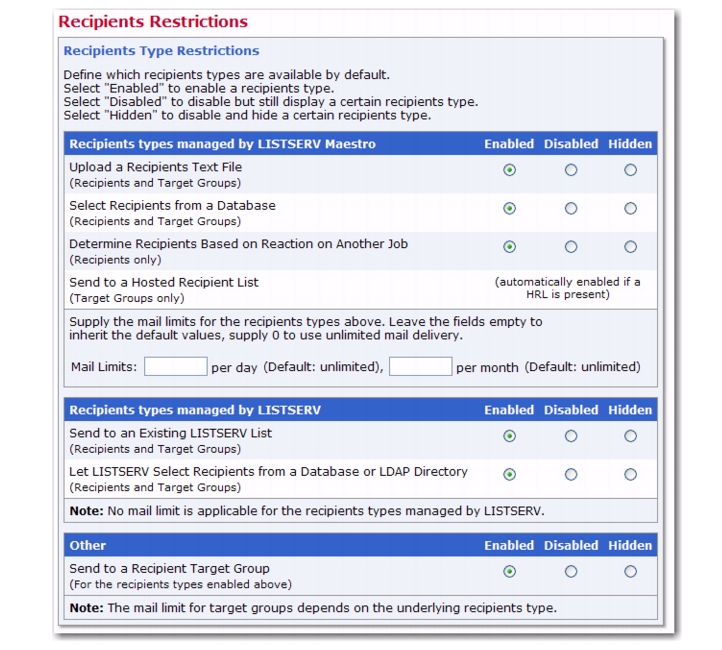
The Default Recipients Restrictions screen is split into two sections. The top section, Recipients Type Restrictions, sets the type of recipients the user is able to use for an email job, in addition to mail limits. If
Disabled is selected, then that option will appear grayed out in the Maestro User Interface, and the user will not be able to select it. If
Hidden is selected, the recipient type will be disabled and will
not appear at all in the Maestro User Interface.
To limit the number of email jobs a group or user sends per day and/or month, click the Enable option next to any of the permissible recipient types (see list below). Next, in the
Mail Limits fields, enter the per day and per month limits. This limit is used to prevent excessive limits for those wishing to control the amount of email being sent (e.g. for server limitation reasons or for license limitations). Limiting the number email jobs sent can only be defined for the following recipient types:
Note: Recipient types that are controlled by LISTSERV (
Send to an Existing LISTSERV List and
Let LISTSERV Select from a Database or LDAP Directory) cannot have email limitations applied to them.
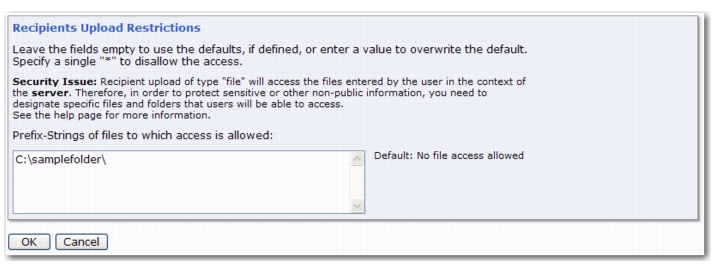
The bottom section, Recipients Upload Restrictions,
contains a text box for the administrator to enter in allowable paths or path prefixes leading to files on a server accessible to the Maestro User Interface. These files are used for uploading "just before sending" CSV files for recipients definitions. If left blank, CSV files used for “just before sending” recipient definitions in the recipients definition wizard will not be allowed.
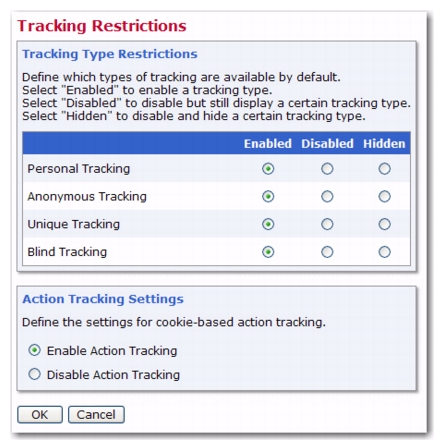
The Default Tracking Restrictions setting defines the type of tracking that will be available, by default. To enable a tracking type, select
Enable. To disable, but still display the tracking type, select
Disabled. To disable and hide a tracking type, select
Hidden.
To enable Action Tracking for the entire User Interface, select Enable Action Tracking. To disable, select
Disable Action Tracking.
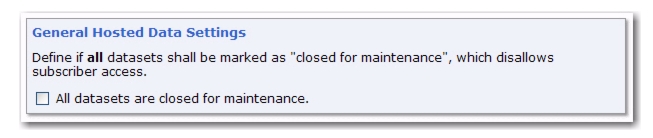
The Default Hosted Data Settings define the settings for hosted recipient data. These settings include:
|
•
|
General Hosted Data Settings – Defines whether or not all datasets are closed for maintenance. This will globally close all datasets for maintenance (in preparation of a server upgrade, etc.). This setting overrides all individual dataset settings. On the dataset overview screen, the text “All datasets closed for maintenance by system administrator” will be displayed (so the data administrator does not wonder why all of the datasets are closed).
|
|
•
|
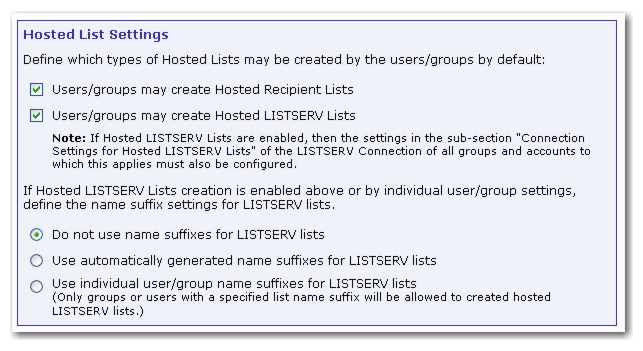
Hosted List Settings – Select whether or not users/groups may create Hosted Recipient Lists or Hosted LISTSERV Lists.
|
If Hosted LISTSERV Lists will be used, optional suffixes for the LISTSERV lists can be used by selecting the option. Since there may not be more than one list with the same name on the same LISTSERV server, employing automatically generated or individual group/name suffixes for LISTSERV list names prevents list creation errors due to duplicate list names. See the online help for more details about name suffixes.
Tip: By installing separate LISTSERV instances, and configuring the LISTSERV connection for each user/group to use a different LISTSERV instance, then the use of suffixes is not necessary to distinguish between lists. Separate instances will also give each group a separate LISTSERV Web Interface for their lists.
|
•
|
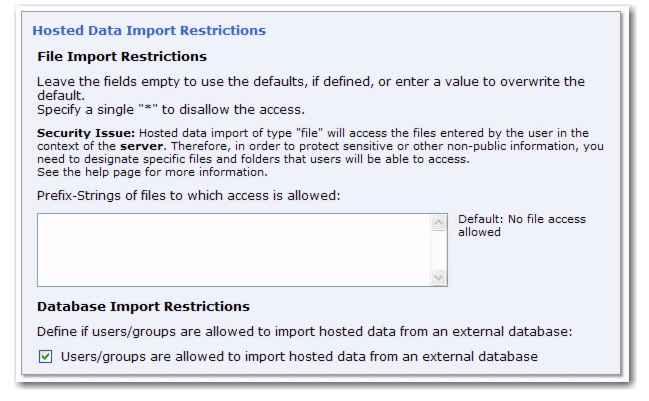
Hosted Data Import Restrictions – Define the file import restrictions and prefix strings for the files that allows access. Access to the server files is restricted and only files that start with one of the prefixes defined here are allowed.
|
Important: In the User Interface, the option to import the data from a text file is only available in the Member/Subscriber Importer wizard if there is at least one such prefix defined. Similarly, the option to define an importer that reads from an external database is only available if the
Users/groups are allowed to import hosted data from an external database option is checked.
A Recipient Importer can either pull data from a database or read it from a file. In the latter case, the file can either be provided by the user at the moment the Recipient Importer is launched, or it can be read from a pre-defined location on the server (defined during importer definition). In addition, a Recipient Importer can be launched manually (from inside User Interface) or externally (with an external trigger, via a URL). Depending on the importer type and the method that is used for launching it, the following will happen:
|
•
|
The Recipient Importer reads from a database and is then launched manually. As soon as the importer is launched, it reads the current data from the external database and imports it into the hosted object.
|
|
•
|
The Recipient Importer reads from a database and is then launched with an external trigger. As soon as the importer is launched, it reads the current data from the external database and imports it into the hosted object. (The request to the trigger URL does not contain any additional data, as the data is read from the database.)
|
|
•
|
The Recipient Importer reads from a file that is provided by the user during launch, and then the importer is launched manually. When the importer is launched, the system first asks the user to select a file to upload. This is the file that the importer is supposed to process. Once the file is uploaded (from the user's local system), the importer processes it.
|
|
•
|
The Recipient Importer reads from a file that is provided by the user during launch, and then the importer is launched with an external trigger. The request to the external trigger URL must be a special POST-request that already contains the file data that the importer will process. (That is, the POST-request to the trigger URL is two things at once – it is the actual trigger that starts the importer, and it is also the upload that provides the data for the importer.)
|
|
•
|
The Recipient Importer reads from a file at a pre-defined server location, and then the importer is launched manually. When the importer is launched, it reads the file from the pre-defined location at the server and processes it. The location was pre-defined when the importer was initially created (in the Member/Subscriber Importer wizard).
|
|
•
|
The Recipient Importer reads from a file at a pre-defined server location, and then the importer is launched with an external trigger. When the importer is launched, it reads the file from the pre-defined location at the server and processes it. The location was pre-defined when the importer was initially created (in the Member/Subscriber Importer wizard). (The request to the trigger URL does not contain any additional data, as the data is read from the file on the server.)
|
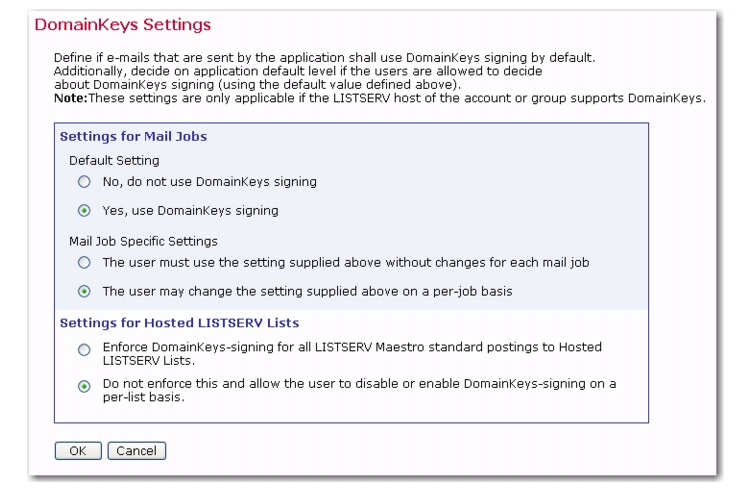
The Default DomainKeys Settings define whether or not to use DomainKeys signatures to authenticate the origin of the LISTSERV Maestro email messages. See Section 21
Authenticating Message Origin with DomainKeys Signatures.
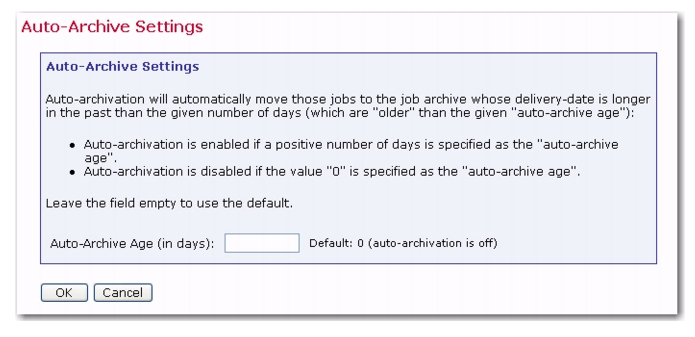
The Default Auto-Archive Settings define whether or not jobs will be automatically archived when the completed job reaches the “auto-archive age”. If the
Auto-Archive Age is set to 0, then the auto-archive setting is off.
Before a user can send mail with open-up or click-through tracking, the administrator first has to configure the tracking URL that LISTSERV Maestro is supposed to use for the mail. The global default setting is used for all accounts that do not have single user or group settings. The default settings, single user settings, and group settings can be combined to offer separate tracking URL settings for different accounts and groups so that the administrator has greater flexibility in terms of customizing the tracking URL for certain accounts or groups.
When LISTSERV Maestro tracks open-up or click-through events, it does so by inserting special tracking URLs into the messages that are delivered. A typical click-through tracking URL looks something like the example below:
In this URL, the hostname points to the server where the Maestro Tracker component is installed. If the Maestro Tracker component is configured to use a non-standard HTTP port, then the tracking URL has to include the HTTP port, like the example below:
The administrator can define the tracking URL on individual account level (for accounts that are not part of a group) or on group level (in which case, the settings are shared by all accounts in the group). Alternatively, the administrator can define default settings which are then used for all accounts/groups that do not have individual settings.
|
•
|
For an individual account which is not part of a group, log into LISTSERV Maestro and go to the Administration Hub. Go to the Accounts and Identities page, and then click on the user name of the account you want to configure. Click on the User Account menu and select URL Settings. The URL Settings screen opens. Edit the URL in the Tracking URL section. The settings you define here will affect only the chosen account.
|
|
•
|
For all accounts in a group, log into LISTSERV Maestro, log into LISTSERV Maestro and go to the Administration Hub. Go to the Accounts and Identities page, and then click on the name of the group you want to configure. Click on the Group menu and select URL Settings. The URL Settings screen opens. Edit the URL in the Tracking URL section. The settings you define here will affect all accounts in the chosen group.
|
|
•
|
To set the default for all accounts/groups that do not have individual settings (as described in the two items above), log into LISTSERV Maestro and go to the Administration Hub. Click on the Global Settings menu, select Maestro User Interface, and then Default URL Settings. The Default URL Settings screen opens. Edit the URL in the Default Tracking URL section. The settings you define here will affect all accounts that do not have a tracking URL configured on individual account or group level.
|
Note: It is not possible to define the tracking URL settings on individual account level for accounts that are members of a group, e.g. all accounts in a group always share the same tracking URL settings.
|
•
|
Protocol – Usually the protocol is “http://” but can also be “https://”.
|
|
•
|
Host Name – Specify the host name that is to be used in the tracking URL.
|
|
•
|
Port – Specify the HTTP (or HTTPS) port that is to be used in the tracking URL, separated from the host name by a colon “:”. This part is optional if you want to use the default port for the given protocol (“80” for HTTP or “443” for HTTPS).
|
On the user/group level, leave the Tracking URL setting empty to use the given default (if any). If left empty with no default given, users of this account/group will not be able to send mails with tracking.
For example, if LISTSERV Maestro is installed behind a proxy, where URLs for external access need to use the proxy’s host name and port, which then transparently forwards the requests to the actual tracker host behind it. In this case, the admin would specify a tracking URL using the proxy’s host name and the proxy-port that is forwarded to the HTTP port on the tracker host as the
Default Tracking URL setting that is to be used by all accounts (also see Section 24.3
Server Name Aliases and Proxies).
Customization is also useful in an environment, where the same LISTSERV Maestro setup is shared between several distinct groups, which want to discern themselves even in the tracking URL that is merged into the mails they send.
For example, the fictitious organization “MyCorp” has two divisions, one for consumer electronics and one for home appliances. The administrator of MyCorp sets up a single LISTSERV Maestro and creates two groups “electro” and “homeapp”. In these groups, the admin creates accounts to be used by the members of the two divisions (which can also employ team collaboration inside of each group). The name of the server where the Maestro Tracker component is installed is “tracker.mycorp.com”, but the users do not want this host name to appear in the tracking URL in the mails that are sent. Therefore, the admin also sets up two DNS names “electro.mycorp.com” and “homeapp.mycorp.com” as aliases for the same server. Finally, the administrator uses the procedure described above to set the individual tracking URLs of the “electro” and “homeapp” groups to use the corresponding host name aliases. Thus, even though both divisions are sharing the same LISTSERV Maestro installation (via their two groups), the tracking URLs generated for the mails they send are “customized” to contain a host name that fits well with each division’s name.
The ability to automatically login to the Maestro User Interface has been added to LISTSERV Maestro 3.2 as an advanced feature and should only be configured by the system administrator. This feature can be set up for both non-group and group users.
http://LUIHOST/lui/index.jsp?user=
USER&password=
PASSWORD
http://LUIHOST/lui/index.jsp?user=
USER&password=
PASSWORD&group=
GROUP
where LUIHOST is replaced with the location of your LISTSERV Maestro User Interface,
USER is replaced with the URL-encoded version of the user name,
PASSWORD is replaced with the URL-encoded version of the password, and
GROUP is replaced with the URL-encoded version of the group name.
Tip: The original Start screen continues to be displayed in the background; therefore, if you click on
Start LISTSERV Maestro for User link again, then another LISTSERV Maestro User Interface session window will be opened, with the same user logged in automatically. To prevent this from happening, you can add an additional URL parameter, “returnURL=
YOURURL”, where
YOURURL is replaced with the URL-encoded version of a page-URL from your own website. The effect of this additional parameter is that once the above URL is accessed (with the "returnURL=
YOURURL" parameter included), then the Start screen will be displayed; however, when you click the
Start link, two things will happen: The LISTSERV Maestro User Interface session will be opened, with the user automatically logged in (just as above). In addition, the original Start screen will be returned back to the
YOURURL given in the "returnURL" parameter.