Datasets that have few lists usually have no special need to organize them in any particular way. Lists are displayed in alphabetical order by list name, regardless of the type of list, hosted recipient list, or hosted LISTSERV list. Subscribers will be able to see all the lists available to them on one page and will not have to scroll to find them. Administrators will recognize each list present in the dataset. Datasets that have many lists, or that want to make a clear distinction between one set of lists and another, can use categories and sub-categories to organize the lists.
Categories act like folders and sub-folders. They can be created at any time, either before or after the creation of hosted lists. Existing lists can be moved into and out of categories by cutting and pasting. New lists can be created inside existing categories.
To create a new category in a dataset, click the Actions link, and then select Create Category. Give the category a name. The name will appear in the left frame and on any public web pages that subscribers can access. Add a description of the lists that appear in the category. This description is to assist the data administrator and only appears internally.
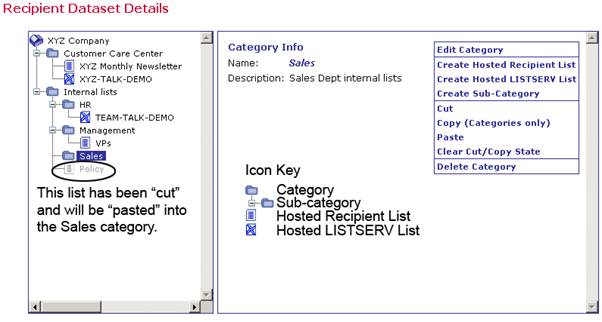
To move an existing list into a category, select the list in the left frame. Click the Action link, and then select Cut. The list will appear in the dataset as “grayed out”. The list still exists within LISTSERV Maestro, and it has not been disabled in any way. It will remain in its current position in the dataset tree until it is pasted somewhere else. Select the category to move the list into, and then click the Action link. Select Paste to move the list into the category. To cancel the cut state and leave the list where it is, select Clear Cut/Copy State.
Figure 61 Dataset Categories