The Archives feature consists of all files other than notebook logs that have been stored on the LISTSERV host for your list.
•
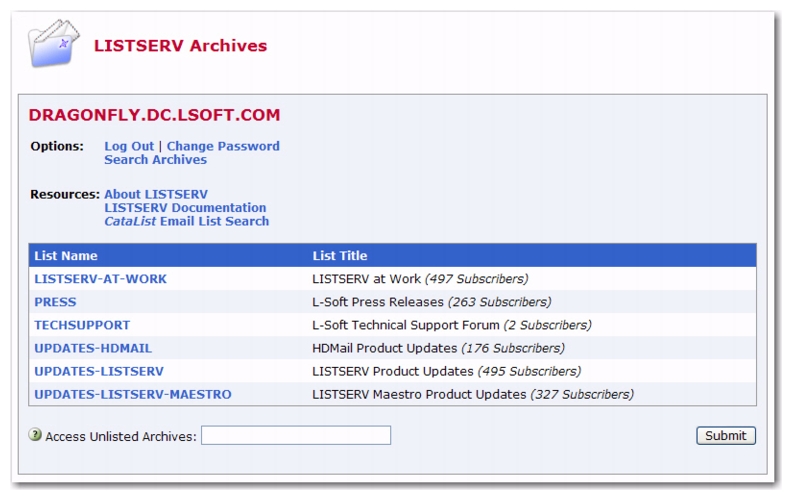
About LISTSERV – Click to open the L-Soft website in your Internet browser. You will be taken directly to LISTSERV's product page.
•
LISTSERV Documentation – Click to open the L-Soft website in your Internet browser. You will be taken directly to the Documentation page.
To access the archives for a specific list, simply click on the list name in the table. If the list is not displayed, then use the
Access Unlisted Archives field to search for it. The
Access Unlisted Archives field allows you to access the archives of confidential lists that are not listed in the archive index. Simply type the name of the list in the text box and click
[Submit]. This field will also work for non-confidential lists.
•
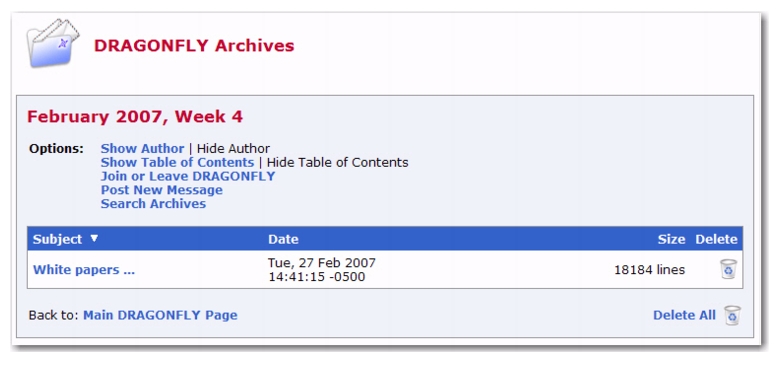
Show Author – Click to show who the message is from (the
From column will be displayed in the table). If this information is already displayed, then this option is not enabled.
•
Hide Author – Click to hide who the message is from (the
From column will not be displayed in the table). If this information is already hidden, then this option is not enabled.
•
Show Table of Contents – Click to show the table of contents. If this information is already displayed, then this option is not enabled.
•
Hide Table of Contents – Click to hide the table of contents. If this information is already hidden, then this option is not enabled.
To sort the table, you can click on one of the column headers (Subject,
From, or
Date). For example, if you click on
Date once, then the messages will be sorted in chronological order – the oldest message is listed first and the most recent message is listed last. If you click on
Date again, then the messages will be reversed chronologically – the most recent message is listed first and the oldest message is listed last. The small white triangle will let you know which column header the table is sorted by and in what order.
Notes: The sort order of the table also determines the Table of Contents. If you sort by
Subject, then the Table of Contents will be sorted by subject. However, when the table is sorted using the
From column, the Table of Contents changes to a List of Contributors that displays who the message is from. The default sorting for the table is set using the
Primary Sorting and
Secondary Sorting options on the Archive Preferences tab under
Preferences. See Section 2.6
Setting Your Personal Preferences for more information.
To view a specific message, click on its subject in the Table of Contents (if visible) or in the table. The message is displayed in the Archive Browsing screen. See the next section for more information.
•
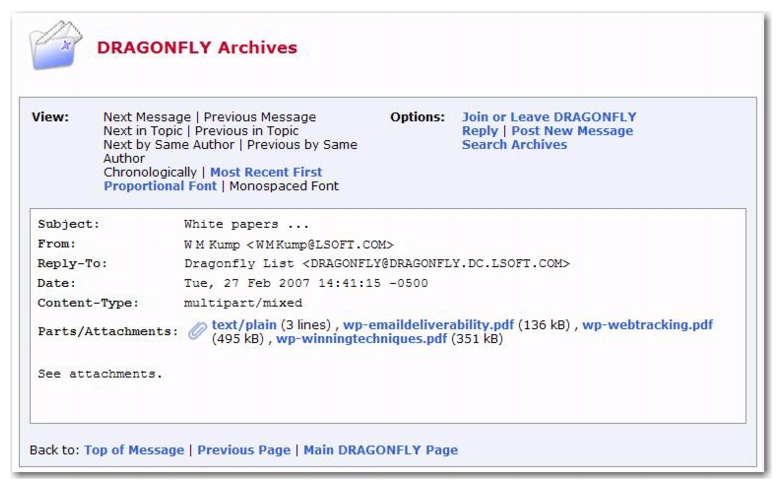
Next Message – Click to view the next message.
•
Previous Message – Click to view the previous message.
•
Most Recent First – Click to view the messages with the most recently posted message listed first.
•
Monospaced Font – Click to to view the message using monospace font.
•
Reply – Click to compose and post a reply to the current message.
•
Search Archives – Click to open the Archive Search screen.
Note: If the message you are viewing contains additional parts or attachments, then the
Parts/Attachments row will be displayed after the email header. To view the part or attachment, simply click on it. For multi-part messages, the default view (
HTML or
Text) is set using the
Default View option on the Archive Preferences tab under
Preferences. See Section 2.6
Setting Your Personal Preferences for more information.
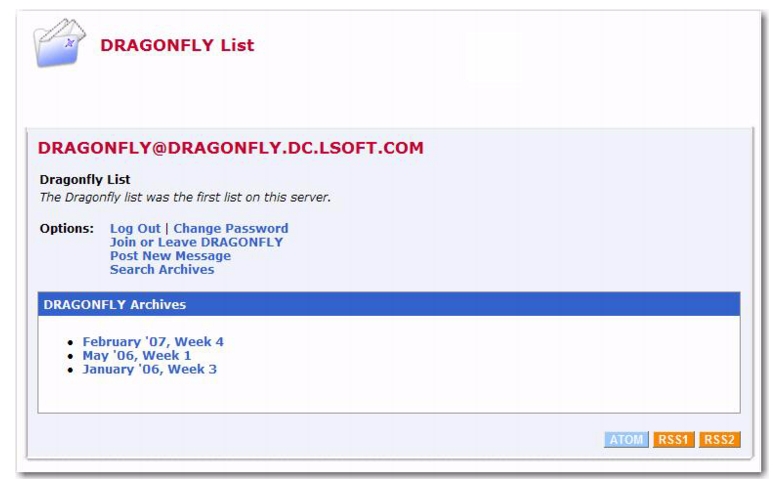
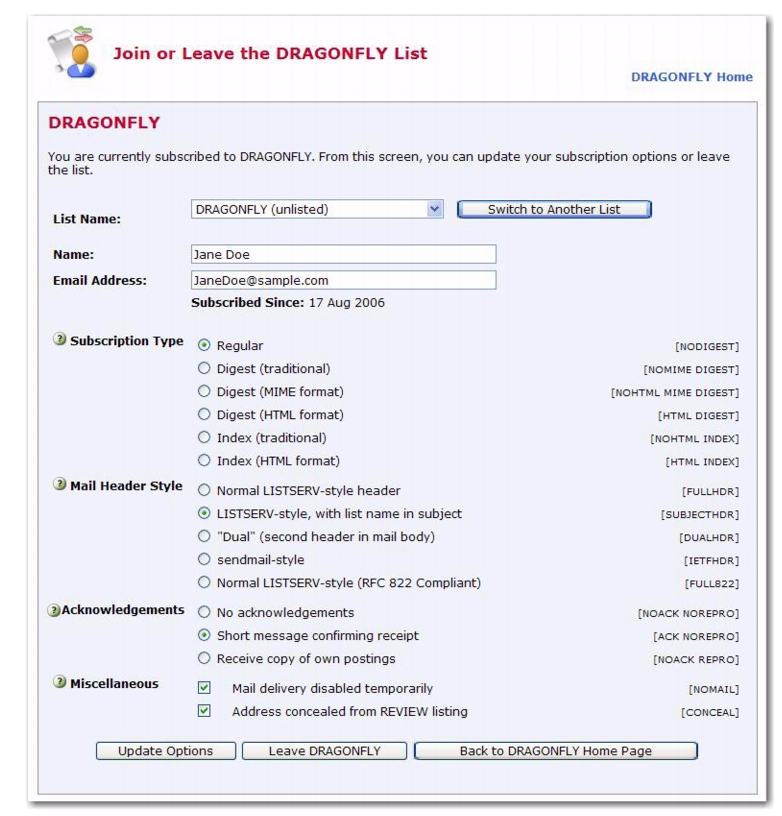
The List Archives screen, the Archive Index screen, and the Archive Browsing screen contain the option for joining or leaving a list. This option brings you to the Join or Leave List screen, which lets you subscribe or unsubscribe to a mailing list and to change your subscription settings.
•
Regular – With a "regular" subscription, you receive individual postings immediately as they are processed by LISTSERV.
•
Digest (Traditional),
Digest (MIME format), and
Digest (HTML format) – With a "digest" subscription, you receive larger messages (called "digests") at regular intervals, usually once per day or once per week. These "digests" are collections of individual list postings. Some lists are so active that they produce several digests per day. Digests are a good compromise between reading everything as it is posted and feeling like the list is clogging your mailbox with a multitude of individual postings. There are three digest formats: a "traditional", text-only format; a MIME format, which (with mail clients that understand MIME digests) "bursts" the individual messages out of the digest so that you can read them separately; and an HTML format, which requires an HTML mail clients.
•
Index (Traditional) or
Index (HTML format) – With an "index" subscription, you receive short "index" messages at regular intervals, usually once per day or once per week. These "indexes" show you what is being discussed on the list, without including the text of the individual postings. For each posting, the date, the author's name and address, the subject of the message, and the number of lines is listed. You can then download messages of interest from the server (the index contains instructions on how to do that). An index subscription is ideal if you have a slow connection and only read a few hand-picked messages. The indexes are very short and you do not have to worry about long download times. The drawback of course is that you need to reconnect to retrieve messages of interest from the server. You can choose to have the index sent to you in either a traditional format (plain text) or in HTML format with hyperlinks.
•
Normal LISTSERV-style header – "Full" mail headers (normally the default), containing Internet routing information, MIME headers, and so forth. The ('To:') header contains the address of the list.
•
LISTSERV-style, with list name in subject – "Full" mail headers (like the default) except that a "subject tag" is added to the subject line of mail coming from the list. If there is no subject tag defined in the list's configuration, the name of the list will be used. This can be very useful for sorting and filtering mail.
•
"Dual" (second header in mail body) – Dual headers are regular short headers followed by a second header inside the message body. This second header shows what list the message is coming from ('Sender:'), the name and address of the person who posted it ('Poster:'), the poster's organization, if present, and the message subject. Dual headers are helpful if your mail client does not preserve the original return email address.
•
sendmail-style (advanced option) – This option selects sendmail-style headers, i.e. an exact copy of the original, incoming mail header with the addition of a ('Received:') line and a ('Sender:') field. Some people prefer this type of header.
•
Normal LISTSERV-style (RFC 822 Compliant) – (For Advanced Use Only) "Full" mail headers (like the default) except that the ('To:') header contains the recipient's email address instead of the list address.
•
No acknowledgements – LISTSERV will not send any acknowledgement at all when you post to the list. This is not a good setting unless you do not want feedback from LISTSERV as to whether or not your posting was received and distributed.
•
Short message confirming receipt – Typically, this is the default setting, although it can be overridden by the list owner. If you choose this setting, LISTSERV will send you a short message whenever you post to the list, confirming the distribution of your message and telling you how many people it was sent.
•
Receive copy of own postings – Some people prefer this setting over the short acknowledgement message. It tells LISTSERV to send you a copy of your own postings so that you can see exactly how it appeared on the list (useful if you are behind an unreliable gateway or firewall).
•
Address concealed from REVIEW listing – This option conceals you from the list of subscribers shown by the REVIEW command. The list owner and administrator can always get the complete list of subscribers, regardless of this setting. Most lists are configured so that only the list owner can use the REVIEW command, but some lists still allow subscribers to get a listing of all the other participants.
For lists with topics enabled, then the Topics section is visible (if the topics section is not visible, topics are not enabled). This section allows you to subscribe or unsubscribe to all, some, or none of the available topics.